Back Office: Inventory Sub Categories
- Sign into the Back Office then select a Store.
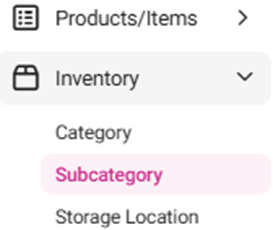
- On the left-side Navigation Panel, click Inventory then Subcategory.

- The Subcategory page appears, including the Total Value on Hand, along with a table containing the following columns:

- Name – Displays the subcategory’s name.
- Category – The category under which the subcategory is assigned.
- Description – Displays description of the subcategory.
- Value On Hand – Displays the available amount of stock.
- Actions – Buttons for Edit (pencil) and Delete (trash can).
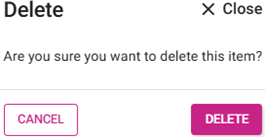
- Delete – The Delete pop-up including the message ‘Are you sure you want to delete this item’ appears, with Cancel and Delete options.

- Select Delete and the Subcategory is sent to Inactive status with a ‘Subcategory inactivated successfully’ confirmation message appearing.
- Select Cancel, and the Subcategory is kept in Active status.
- Active
- By default, the button will be set to Active and all Active Categories appear.
- Select Active to change to Inactive, and shows deleted Categories appear. If no deleted Categories appear, the message Category not found appears in the body of the table.
- Select Inactive to change back to Active. A pop-up appears which shows ‘Are you sure you want to activate this item’ with Cancel and Yes, Activate options.
- Yes, Activate: the ‘Adjust Inventory Reason Activated Successfully’ pop-up appears.
- Cancel: the pop-up will be closed.
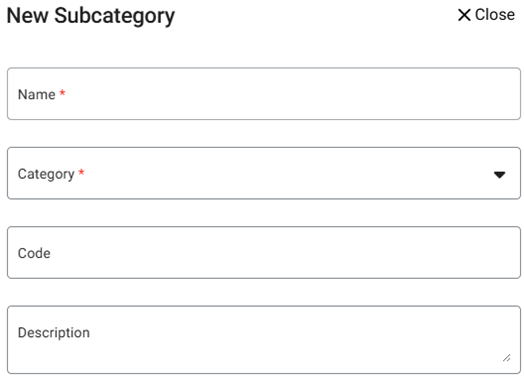
- Create a new Subcategory by clicking the pink + New Subcategory button at the top-right (or click the corresponding Edit [pencil] of an existing Subcategory).
The New Subcategory (or Update Subcategory) pane appears, with the following fields:
- Click X Close / Cancel to close the pane without creating / updating a Subcategory.

- Code – Enter the code for the subcategory (letters and numbers allowed, no maximum).
- Description – Enter more details about the subcategory (letters and numbers allowed, no maximum).
- Click Save / Update. You’re returned to the Subcategory page with a confirmation message appearing at the top-right.

Related Articles
Back Office: Inventory Items
Sign into the Back Office. On the left-side Navigation Panel, click Inventory then Inventory Item. The Inventory Item page appears, with tabs for Inventory Items and Retail Items – along with a Select Categories dropdown and a Total Value On Hand. ...
Back Office: Inventory Report
Log into the Back Office and select a Store. Under Reports > Inventory Reports. On the Inventory Reports dashboard, select a tab. Master Stock Purchased Item Consumption Log Compare Inventory Count Sheet COGS Adjust Inventory Inventory Item History ...
Back Office: Home
Sign into the Back Office. then select a Store. You should be taken to that store’s Home page. If not, then on the left side navigation, click Home. Tip: Type the name of the Store in the Search bar for quicker Store selection. For every Dashboard ...
Back Office: Enterprise - Central Kitchen
Sign into the Back Office. On the left-side Navigation Panel, click Enterprise. On the Enterprise page, click Central Inventory then select Central Kitchen. The main Central Kitchen page contains tiles of existing kitchen - with a Search option, a ...
Back Office: Products/Items - Products/Items
Sign into the Back Office and select a Store. On the left-side Navigation Panel, click Products/Items then Products/Items. Creating a New Menu Item On the Products/Items screen, click + New Menu Item or click the ••• under Actions to Edit, Copy or ...