Back Office: Open Item Discounts
- Sign into the Back Office and select a Store.
On the left-side Navigation Panel, click Products/Items then click Discounts.


- On the Discounts page, select the Open Item tab. On the Open Item page, click Edit.
- Tip: You can Activate or Deactivate the Discount. If it shows Activate it means the Discount is currently Deactivated.

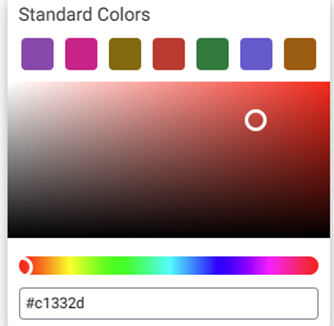
- POS Display Button - Click the small colorized square next to the large one. The Standard Colors pane appears. Select the Standard Color and use the slider to adjust the shade.

- Enter the Name, Priority (typically 1), Quantity (number of times ordered to unlock Discount), and whether to Apply Before or After Tax. The Name appears on the Display Button.

- Select the Discount Type (Promo, Comp, or Donation).

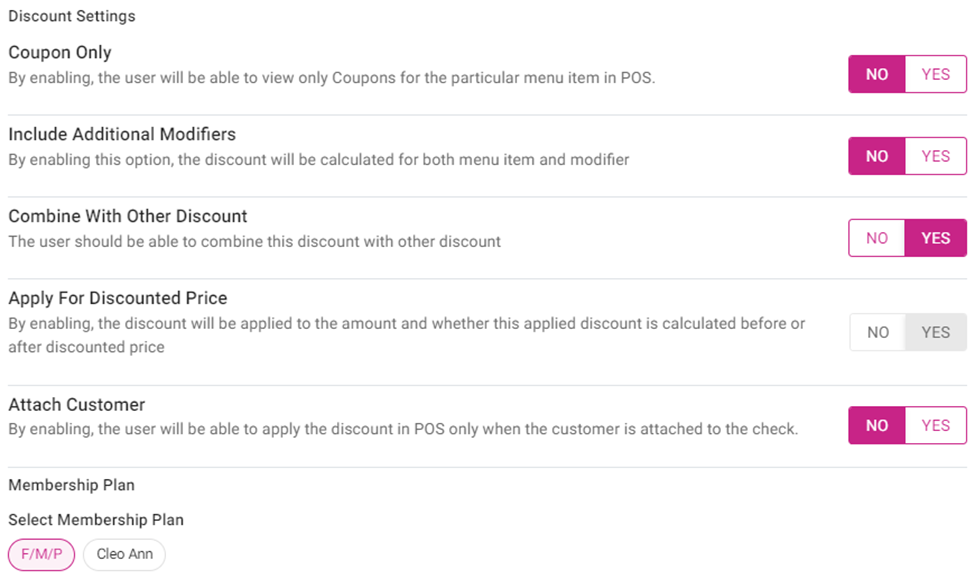
- Select the Discount Settings:
- Select whether this Discount is Coupon Only.
- Select whether to Include Additional Modifiers.
- Select whether to Combine With Other Discount. If Yes, then Apply For Discounted Price appears and is enabled.
- Select whether there is a requirement to Attach a Customer to the check to apply the Discount.
- Select whether there is a Membership Plan for this Discount.

- Rates
- Select whether there is a Discount In Percentage. If Yes, enter the Minimum and Maximum Percentages.

- Select whether there is a Discount In Amount. If Yes, enter the Minimum and Maximum Amounts, then the Safety Limit Percentage.

- Select the Visibility – Choose whether to Restrict Visibility by Role. If Yes, select the Roles that are eligible for this Discount. Click Show All to view all the Role options.

- Click Update and Publish. (The button appearing pink means updates have been made).

Related Articles
Back Office: Open Check Discounts
Sign into the Back Office and select a Store. On the left-side Navigation Panel, click Products/Items then click Discounts. On the Discounts page, select the Open Item tab. On the Open Item page, click Edit. Tip: You can Activate or Deactivate the ...
Back Office: Item-Based Discounts
Sign into the Back Office and select a Store. On the left-side Navigation Panel, click Products/Items then click Discounts. Create an Item Based Discount On the Discounts page, select the Item Based tab (default selection), then click + New Discount. ...
Back Office: Discounts Report
Sign into the Back Office and select a Store. On the left-side Navigation Panel, click Reports then Discount. Sales Created By Window – When a Sales Created By value is clicked, a new window opens: Upon clicking the Sale Created By employee, it ...
Back Office: Check-Based Discounts
Sign into the Back Office and select a Store. On the left-side Navigation Panel, click Products/Items then click Discounts. On the Discounts page, select the Check Based tab, then click + New Discount. You’re taken to the Check Based page. Tip: You ...
Back Office: Mix-and-Match Discounts
Sign into the Back Office and select a Store. On the left-side Navigation Panel, click Products/Items then click Discounts. On the Discounts page, select the Mix and Match tab, then click + New Discount. You’re taken to the Mix and Match page. POS ...