Back Office: Products/Items Categories
Sign into the Back Office then select a Store.
On the left-side Navigation Panel, click Products/Items then Category.
On the Category screen: create a New Category by clicking + NEW CATEGORY or update an existing Category by clicking the pencil icon.
For a Display Group:
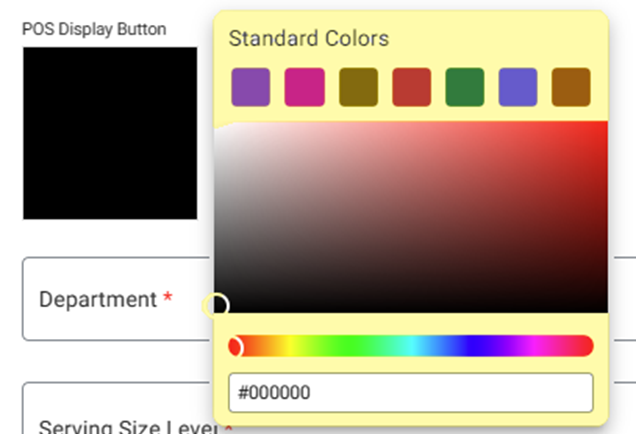
Set a POS Display Button for the Category to display as:
Standard Color
Click the small colorized square (next to the larger colorized square).
Select the color by using the 2 sliders.
Upload New Image
Click the icon of the  document with the upwards facing arrow. A File Explorer pop-up window appears.
Navigate to where your Display Button image is saved, then select the file and click Open or just double-click it.
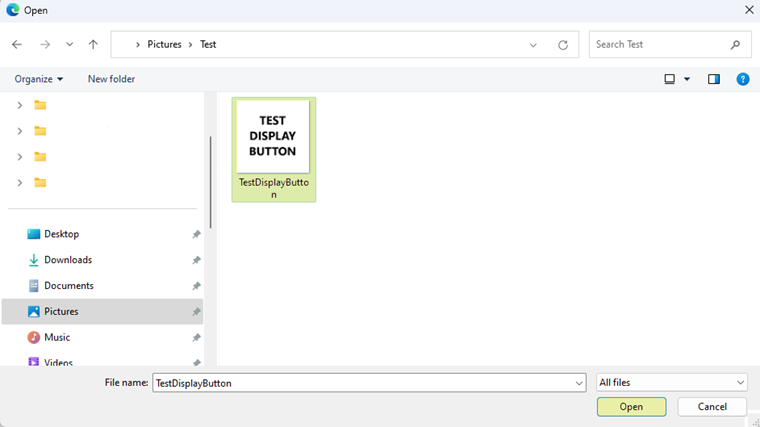
File Format – JPG or PNG
File Size – Maximum of 2 MB
Resolution – Recommended 400px by 400px
General – Name
Set the Name – the name will appear as a caption for the Display Button.

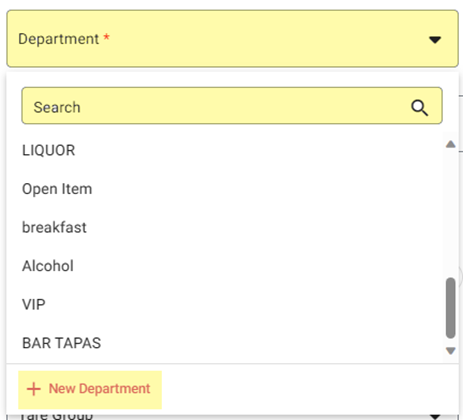
General – Department
Select the Department from the dropdown (established under Products/Items > Departments). Also, here you can create a new Department by clicking + New Department.
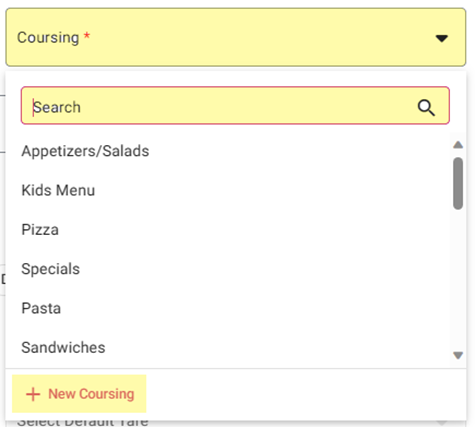
General - Coursing
Select the Coursing from the dropdown (established under Products/Items > Coursing). Also, here you can create a new Course by clicking + New Coursing.
General – Serving Size Level
Select the Coursing from the dropdown (established under Products/Items > Coursing). Also, here you can create a new Course by clicking + New Coursing.
Related Articles
Back Office: Products/Items - Products/Items
Sign into the Back Office and select a Store. On the left-side Navigation Panel, click Products/Items then Products/Items. Creating a New Menu Item On the Products/Items screen, click + New Menu Item or click the ••• under Actions to Edit, Copy or ...
Back Office: Bulk Update Products/Items
Sign into the Back Office then select a Store. On the left-side Navigation Panel, click Products/Items then Bulk Update. You are taken to the Bulk Update page. On the Bulk Update page, you can narrow down the Category / Sub Category options by ...
Back Office: Sub Categories
Sign into the Back Office. On the left-side Navigation Panel, click Products/Items then click Subcategory. On the Subcategories page, click + New Subcategory at the top-right. POS Display Button - Click the small colorized square next to the large ...
Back Office: Modifiers
Sign into the Back Office and select a Store. On the left-side Navigation Panel, click Products/Items then Modifiers. On the Modifiers screen: create a New Modifier by clicking + NEW MODIFIER or update an existing Modifier by clicking the pencil ...
Back Office: Inventory Report
Log into the Back Office and select a Store. Under Reports > Inventory Reports. On the Inventory Reports dashboard, select a tab. Master Stock Purchased Item Consumption Log Compare Inventory Count Sheet COGS Adjust Inventory Inventory Item History ...