Retail Back Office: Inventory - Vendors
Navigation: Sign into the Back Office and select a Retail Store, then select Inventory > Vendor
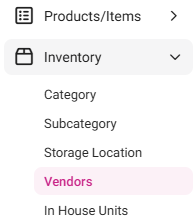
The Vendor page appears, including the Total Value on Hand along with a table containing the following columns:

- Name – The name of the vendors.
- Description – A brief description of vendor.
- Phone Number – The phone number of vendor.
- Email ID – The email address of vendor.
- Address – The mailing address of vendor.
- Contact Name – The name of the contact person.
- Contact Number – The phone number of the contact person.
- Actions – Buttons for Edit (pencil) and Delete (trash can).
- Delete – The Delete pop-up including the message ‘Are you sure you want to delete this item’ appears, with Cancel and Delete options.
- Select Delete and the Vendor is sent to Inactive status with a ‘Vendor inactivated successfully’ confirmation message appearing.
- Select Cancel, and the Vendor is kept in Active status.
Create a New Vendor (or Update an Existing Vendor)
- Create a new Vendor by clicking the pink + New Vendor button at the upper-right (or click the corresponding Edit [pencil] to update an existing Vendor).
- The New/Update Vendor pane appears. Enter or update the Vendor’s information, as needed.
- Name – (Mandatory) Enter the name of the Vendor (maximum of 25 characters).
- Phone Number – Enter the phone number (only numbers allowed).
- Email – Enter the Email Address of the vendor.
- Description – Enter a detailed description of the vendor.
- Contact Name – Enter the name of the contact person.
- Phone Number – Enter the phone number of the contact person.
- Address Line 1 – Enter the number and street name of the address.
- Apt, Suite, etc. (optional) – Enter the specific Apt, Suite, Unit, etc. number (if applicable)
- City – Enter the City where the address is located.
- State – Enter the State where the address is located.
- Zip Code – Enter the ZIP Code where the address is located.
- Select Save to create the new Vendor (or Update to update the existing Vendor). You’re returned to the Vendor page, and a confirmation message appears at the top-right.
- Click Cancel / Close to close the pane without creating or updating the Vendor.