POS: Check Options - Tax Exempt
To change a Check to become Tax Exempt:
- Tap on the Option
button, then on the Check Options pop-up select the Tax Exempt option.
- After tapping the Tax Exempt option, the respective Check will be exempted from Tax.
Note: Only Employees with the proper Role and Permission settings have access to apply Tax Exempt.
Tax Exempt Reason & Reference ID Inclusion in POS
Background in Back Office
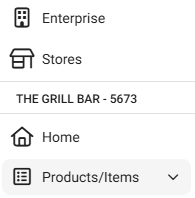
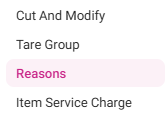
Navigation: Log into BO and select a Store, then select Products/Items > Reasons


On the Reasons page, you can define Reasons for Tax Exempt.
To add a new Reason:
- Click the + New Reason button at the upper-right of the Reasons page (or click the corresponding pencil under Actions). The New/Update Reason pane appears:
- Select the Reason Type for the Tax Exemption.
- Provide the Reason for the New Reason.
- Maximum of 25 characters.
Implementation in POS
- Select Tax Exempt from the Check Option pop-up.
- The Tax Exempt pop-up appears, which displays the Reason(s) created in Back Office.
- Select the Reason then the Tax will be removed from POS.
- If the Tax Exempt option is de-selected, then the Tax Exempt is removed and the 'Tax Exempt Removed Successfully' pop-up appears.
- The Tax Exempt ID pop-up will appear on the Tax Exempt screen.
Background in Back Office
Navigation: Log into BO and select a Store, then select Settings > General Settings
Require Tax ID on Exempt Transaction
If the toggle is enabled (Yes), the system will prompt a Tax Exempt ID box to perform a tax exemption.
If the toggle is disabled (No), it will not prompt.
Implementation in POS
If you select the Tax Exempt option from the Check Options screen:
Tax Exempt Reference ID Toggle - ENABLED
- If the Require Tax ID on Exempt Transaction option is enabled (set as YES), then when selecting the Tax Exempt option, the Reason(s) created in BO will be displayed.
- After selecting a Reason: a pop-up for entering the Tax-Exempt ID will appear, with Cancel and Ok options.
- After providing the Tax-Exempt ID and selecting Ok, the pop-up will be closed and the respective Check will be exempted from Tax.
- Upon clicking Cancel, the pop-up will be closed.
Tax Exempt Reference ID Toggle - DISABLED
When the Tax Exempt Reference ID toggle is disabled (No), the Tax Exempt ID pop-up won't appear in POS.
Do Not Reset Check Numbers
- Navigate to the Settings page and set the Do Not Reset the Check Number's Daily option as Yes.
- The Check Numbers will not reset with the end of the day.
- If No, It will reset end of the day. Changes will reflect when you sign out then sign-in again.
Related Articles
POS: Check Options - Gratuity Tax
Back Office (BO) Navigation: Log into BO, select a Store, then select Products/Items > Gratuity When creating a new Gratuity or update an existing Gratuity: The toggle Taxes appears below Auto Gratuity. Upon enabling the toggle, the Taxes drop down ...POS: Payment Screen Options
Log in to POS, add Menu Items then click on the Payment option. On the Payments page: the options Tax Exempt, Add Gratuity, Discount and Print options will appear. Tax Exempt When Tax Exempt is selected: the Tax Exempt pop-up appears, and displays ...POS: Uber Eats Integration
For more information on the Uber Eats (UE) Integration, see the Uber Eats Knowledge Article. Uber Eats Orders Appearing in POS Once an Order is placed from Uber Eats, the message ‘You have 1 online order’ appears in POS. The Check will be listed ...POS: Check Options - Service Charge Exempt
Back Office For more information on Service Charge functionality in the Back Office, see the following Knowledge Articles: Item Service Charge Store Payment Settings POS To exempt a Service Charge from the Check: On the Menu screen, select the Option ...POS: Customer Profile Screen
Adding a Customer to an Order To add a Customer to the Order: Tap on the icon of a person's profile with a plus (+) sign at the top of the Order section. The Add Customer screen appears. To add an existing Customer to the Check: type their name in ...