POS: Table Layout - QR Payment
Back Office
Front End Receipt
Navigation: Log in BO then select Settings > Printer Templates > Front End Receipt
On the Front End Receipt Template Settings page:
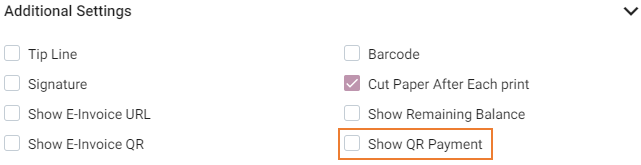
- Select the corresponding checkbox for Show QR Payment.
- An example of the QR Code will appear in the Template Preview section to the right. This QR Code can be used to complete Payments on Orders.
Receipt Printers
Navigation: Log in BO then select Settings > Hardware > Receipt Printers
On the Receipt Printers Settings page:
- Create a new Receipt Printer (or update an existing Receipt Printer):
- Enter the details like Name and IP Address.
- Select the Model to connect with printer, then whether to Set the Printer as Default.
POS
Connecting with a Printer
- Log into POS and select Settings.
- Select Operation then Hardware Settings.
- Check the Printer list and connect with a Printer (it must be set/enabled in BO).
- Once connected, a check mark will appear to the right.
- If the Printer is offline the word Offline will appear in red to the left; If Online it will appear in green.
Printing (or Re-Printing) a Check
- Take an Order in POS (Order Type will be Dine-In, Bar Tab).
- Click All.
- Click Check Status. Go to the Active tab.
- Select the Check to be printed and click Re-Print Check button.
- The printout (Receipt) will have details along with QR Code.
- Both Print and Re-Print Check options will produce a printed Receipt that contains a QR Code.
Order Specific QR Code
- When an Order is placed, a QR Code will be created.
- Scan the Code with a compatible app.
- The link associated with the QR code will be displayed in the following format.
- https://{StoreName}.zenpepper.com/qr-pay-demo/{SequenceOfNumbersAndLetters}/{CheckNumber}
- Example: https://PizzaStore.zenpepper.com/qr-pay-demo/5e41596c9463670001a89bc9/02-007
- Click the link. The Online Ordering (OLO) page will be opened, with a Login pop-up appearing.
- Sign in with an existing User's credentials (or by continuing as Guest).
- The Store's Payment Details page appears. Complete the Payment for the Check by providing the needed Payment information.
- When an Order is made and transaction is successful, then the Check will be moved from Active tab to Complete tab.
- Once completed, the Check will be moved to the Closed tab.
Show QR Payment Toggle is Disabled
If the Show QR Payment toggle is disabled in BO, the Receipt will not show the QR Code.

- Note: If a Menu Item is selected, an Order is placed, and a Receipt with a QR Code is received, but the QR Code is not scanned nor is Payment made through OLO: the Check will remain in Active status.
Rare Scenarios for Split by Check / Seat Table Layout
- When an Item-Based Discount is split between the different Seats: the proportional Discount will be distributed with different Seats.
- When split evenly is done, the discount will be uniformly split the two seats and when grouped seats, the split discount will be uniformly moved to a single seat.
- When a Check Based Discount is split between Seats: the Discount will be split with Seats. However, when a Split By Check is performed: the proportional Discount will be removed since the Discount is only applied to the Check.
- When a Mix and Match Discount is split between different Seats, it will be split uniformly with the Seats of the Check.
- When Mix and Match Discount, is split between the Checks the applied Mix and Match Discount will be removed.
- An Open Item Discount will be removed when its Split By Check, but when Split By Seat it will be uniformly split.
- Open Check Discount will be removed when Split By Seat, when Split By Check and also when you separate an item in Split By Check section.
Related Articles
POS: Table Layout - Overview
If you are a Table Service restaurant, POS provides the ability to draw table maps of all the service areas. Note: The Table Settings will be configured in the Back Office. For more information see the Table Settings Knowledge Article. Table Status ...POS: Table Layout - Split Checks
This option is used to split the Check for different Seats. Select the Split option on the bottom the Table Layout screen. The Split pop-up appears. Split Check When you select Split Check, the Split Check screen appears. Note: Only Employees with ...POS: Table Layout - Table Expiration Time
Back Office Navigation: Log into Back Office, then select Home > Settings > Application > General Settings On the General Settings page: enter the Table Expiration Time (in Minutes) based on the needs of the Store. This will serve as the threshold ...Back Office: Table Layout Application Settings
Sign into the Back Office and select a Store. On the left-side Navigation Panel, click Settings. On the Settings page, under Application click Table Layout. The Table Layout screen appears. Adding a new Floor: To add a new service Floor, click + Add ...POS: Table Layout - Merge Checks
This option is used to Merge the Checks of different Tables. When you select a Table, the corresponding Check will be listed in the pop-up. If the Table has multiple Checks, then a pop-up with all available Checks will appear. If there is a Discount ...