Retail Back Office: Scale Barcode Addon Settings
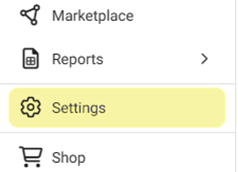
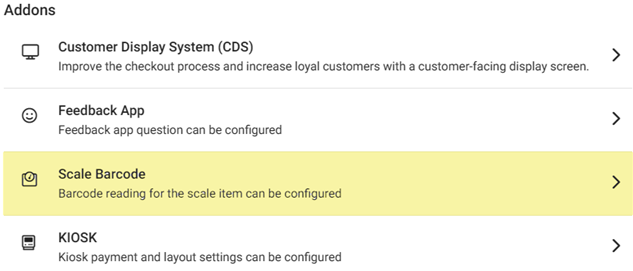
Navigation: Sign into the Back Office for your Retail Store. On the left-side Navigation Panel, click Settings. On the Settings page, under Addons click Scale Barcode.
The Scale Barcode screen contains a table with columns for Name, Prefix/Variable Type, PLU Code, Price Details, and Weight Details. Also, there are actions for Edit (Pencil) and Delete (Trash Can).

Create or Update Scale Barcode
- Click + New Scale Barcode, or under Actions click the corresponding Edit (Pencil) of an existing Barcode. The New/Update Scale Barcode pane appears.
- Variable Type Name – (Mandatory) Enter the Name, which cannot exceed 25 characters.
- Prefix/Variable Type – (Mandatory) Enter Type, which can only be a 2-digit value (00 to 99).
- For the PLU Code, only numeric values can be entered. It can’t exceed 50 digits. It will be configured to be read as a Retail Item barcode.
- PLU Start Position – Enter the starting position, or use ▲/▼ to change the value.
- PLU No. of Digits – Enter the number of digits, or use ▲/▼ to change the value.
- Set Scale By – Set the Scale By Price (Default) or Weight. The scale will be set based on the selection.
- Price – Enter the Price Start Position and Price No. of Digits. Numeric values only.
- Weight – Enter the Weight Start Position and Weight No. of Digits. Numeric values only.
- Click Save or Update at the bottom-right, and you're returned to the Scale Barcode settings page. For a newly created barcode, it will be added to the POS and appear in the Scale Barcode table. You must fill in all mandatory fields before being able to save.
- Click X Close at the top-right (or Cancel at the bottom-left) to close the pane without creating/updating and return to the main Scale Barcode screen.
Example of Scale Barcode Settings
Note: The above barcode was generated by a scale with Barcode printing capabilities, not by Cloud POS.
How to Extract Information from a 12-digit Barcode for Programming
- Variable Type Name: Weighted Item
- Name of the barcode type.
- Prefix: 2
- The leading digit 2 identifies the barcode as a weight-based item in North America. (Highlighted in green)
- PLU Starting Position: 2
- The PLU for this item is 00129. It starts at position 2 in the barcode. (Highlighted in yellow)
- PLU Number of Digits: 5
- The PLU contains 5 digits (00129), so the configured value is 5.
- Set Scale by Price
- Price Starting Position: 7
- The price starts at position 7 in this barcode format. The item's price is $23.63. (Highlighted in blue)
- Price Number of Digits: 5
- This barcode format allows up to 5 digits for the price, meaning the value entered is 5.
- Check Digit
- The last digit in the barcode is a check digit, used for error detection. This digit is automatically calculated using the Modulus-10 algorithm and is not manually configured. It is not highlighted in the barcode. We will not be using the check digit for our setting shown above
Related Articles
Back Office: Scale Barcode Add On Settings
Sign into the Back Office and select a Store. On the left-side Navigation Panel, click Settings. The Settings page appears. Under Addons click Scale Barcode. The Scale Barcode screen appears. The Scale Barcode screen contains a table with columns for ...Retail Back Office: Feedback App Addon Settings
Navigation: Sign into the Back Office and select a Store. On the left-side Navigation Panel, click Settings. On the Settings page, under Addons click Feedback App. The Feedback App page contains the option to add up to 2 Questions with up to 4 ...Retail Back Office: Label Template Settings
Navigation: Log into the Back Office for your Retail Store. On the left-side Navigation Panel, click Settings. On the Settings page, under Printer Templates, select Label Templates. The Label Template screen allows you to customize what prints on ...Retail Back Office: Email Receipt Template Settings
Navigation: Sign into the Back Office for your Retail Store. On the left-side Navigation Panel, click Settings. On the Settings page, under Printer Templates select Email Receipt Template. The Email Receipt Template page is for configuring what you ...Retail Back Office: Enterprise - Reports
Navigation: Sign into the Back Office. On the left-side Navigation Panel, click Enterprise. Select Enterprise Reports, and the dropdown contains options to access specific reporting Dashboards: Enterprise Reports Sale Report The Sale Report dashboard ...