Back Office: Feedback Report
Sign into the Back Office and select a Store.
On the left-side Navigation Panel, click Reports then Feedback.
The Feedback Report page contains a table with the following columns:
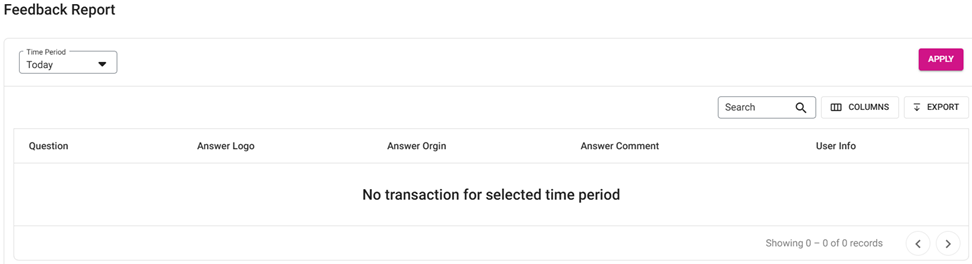
Question – What question was asked of the customer.
Answer Logo – The emoji selected by the customer, representing their answer.
Answer Origin – Where feedback was collected (such as in App).
Name – The name of the customer.
Answer Comment – Any additional comments provided by the customer.
User Info – The customer’s contact info (Email, Phone Number, etc.).
Note: The info will appear when it’s mandatory. Otherwise, User Info will be blank.
Click Apply. The table will populate based on the selected Time Period.
When there is no table data for the selected Time Period, the message ‘No transaction for the selected time period’ appears in the body of the table.
Related Articles
Back Office: Discounts Report
Sign into the Back Office and select a Store. On the left-side Navigation Panel, click Reports then Discount. Sales Created By Window – When a Sales Created By value is clicked, a new window opens: Upon clicking the Sale Created By employee, it ...
Retail Back Office: Discounts Report
Navigation: Sign into the Back Office for your Retail Store. Select Reports > Discount Sales Created By Window – For certain reports, when a Sales Created By value is clicked, a new window opens: Upon clicking the Sale Created By employee, it routes ...
Back Office: Home
Sign into the Back Office. then select a Store. You should be taken to that store’s Home page. If not, then on the left side navigation, click Home. Tip: Type the name of the Store in the Search bar for quicker Store selection. For every Dashboard ...
Back Office: User Role Management
Sign into the Back Office and select a Store. On the left-side Navigation Panel, click User Management then select Roles. On the Roles page, click + New Role at the top-right. The New Role pane appears. You can update a Role by clicking the ...
Retail Back Office: User Management - Roles
Navigation: Sign into the Back Office for your Retail Store, then select User Management > Roles The Roles page appears, which displays a table of the currently existing Roles within this Retail Store, with the following columns: Create a New Role or ...