Back Office: User Role Management
- Sign into the Back Office and select a Store.
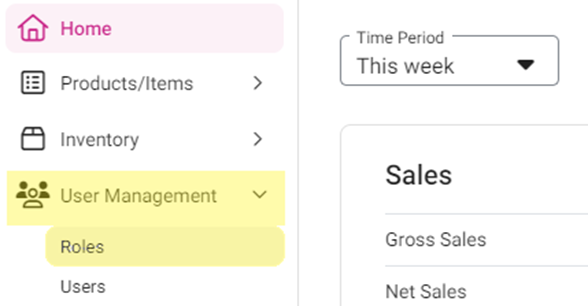
- On the left-side Navigation Panel, click User Management then select Roles.
- On the Roles page, click + New Role at the top-right. The New Role pane appears.
- You can update a Role by clicking the corresponding ••• then Edit under Actions.

- On the New / Update Role pane:
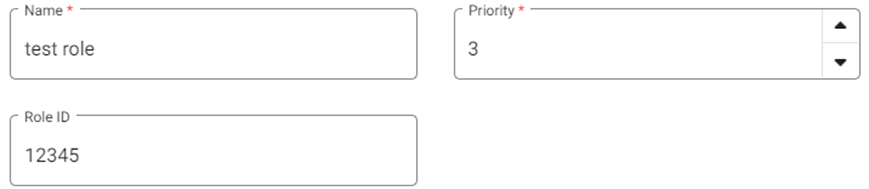
- Under General: enter the Name of the Role, select the Priority, then enter a Role ID.
- Name – (Mandatory) Maximum of 25 characters.
- Priority – (Mandatory) Any Priority numbers of existing Roles won’t appear as options.
- Role ID – (Optional) Numbers and letters are accepted, with maximum of 25 characters.
- Select the Role’s permissions: click each section and select the boxes you want enabled for the Role to have that access (some boxes will automatically be checked). Select Select All to check all boxes within the dropdown section.
Back Office
- MENU CONFIGURATION – Access to Menu configuration in POS
- GRATUITY - Permission to access Gratuity configuration in BO
- GIFT CARD - Permission to access Gift Cards and Reimbursement for the customers
- PRINTER SETTINGS - Permission to view Printer settings
- TAX SETTINGS - Permission to access Tax settings for products and items in BO
- STORE SETTINGS - Permission to access Changes from Store settings
- STORE INFO - Permission to access Store info and details of the store
- REPORT - Permission to access Reports from BO
- DISCOUNT SETTINGS - Permission to access Discount settings configuration for Menu Items
- INVENTORY SETTINGS - Permission to access Inventory settings and management
- CUSTOMER - Permission access to Customer details in BO
- USER MANAGEMENT - Access to User Management details (Create Roles / Users / Tip Adjustment / Forced Punch In/Out)
- DISABLE BACK OFFICE LOGIN – Disabling access to BO login.
- BATCH - Permission to Batch payment settings
- LOYALTY POINT ADJUSTMENT - Permission to Loyalty Points adjustment for the customer
- SHOW INVENTORY COUNT IN ADJUSTMENT - Permission to inventory adjustments made for the customer

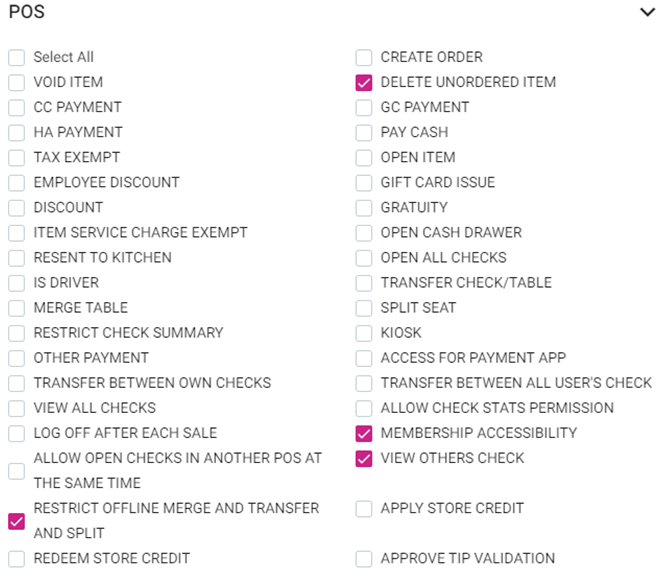
POS
- CREATE ORDER – Permission to create an order from POS
- VOID ITEM – Permission to void a sale
- DELETE UNORDERED ITEM (auto-selected) - Permission to void an Item or Check that has not yet been sent to the kitchen
- CC PAYMENT – Permission to process Credit Card payments
- GC PAYMENT – Permission to process Gift Card payments
- HA PAYMENT – Permission to process House Account payments
- PAY CASH – Permission to pay cash to complete a sale
- TAX EXEMPT – Permission to process a tax exemption for an item when completing a sale
- OPEN ITEM – Permission to create an Open Item in POS for products not pre-programmed in the Back Office (BO)
- EMPLOYEE DISCOUNT – Permission to give an Employee Discount for a sale
- GIFT CARD ISSUE – Permission to issue a Gift Card to a new customer
- DISCOUNT – Permission to apply a Discount made for a sale
- GRATUITY – Permission to apply a Gratuity for a sale access
- ITEM SERVICE CHARGE EXEMPT – Permission to exempt an Item Service Charge for a Menu Item
- OPEN CASH DRAWER – Permission to access the cash drawer
- RESENT TO KITCHEN – Permission to resend menu items to the kitchen
- OPEN ALL CHECKS – Permission to open all checks (Open, Active, Closed, Refund)
- IS DRIVER – Access to drivers (will be shown in Active Drivers section in POS)
- TRANSFER CHECK/TABLE – Permission to transfer Checks between Tables
- MERGE TABLE – Permission to merge tables
- SPLIT SEAT – Permission to split seats
- RESTRICT CHECK SUMMARY – Restricting access to the Check Summary
- KIOSK – Access to the Kiosk
- OTHER PAYMENT – Access to the Other Payment option
- ACCESS FOR PAYMENT APP – Access to the Payment app
- TRANSFER BETWEEN OWN CHECKS – Access to transfer between user’s own checks
- TRANSFER BETWEEN ALL USER'S CHECK – Access to transfer between all users’ checks
- VIEW ALL CHECKS – Access to view all checks
- ALLOW CHECK STATS PERMISSION – Access to view the Check Status screen
- LOG OFF AFTER EACH SALE – After every sale the system will be logged off
- MEMBERSHIP ACCESSIBILITY (auto-selected) – Access to customers’ Membership information
- ALLOW OPEN CHECKS IN ANOTHER POS AT THE SAME TIME – Permission to open the same Check in multiple POS systems simultaneously while being active on one POS
- VIEW OTHERS CHECK (auto-selected) – Access to view others’ checks
- RESTRICT OFFLINE MERGE AND TRANSFER AND SPLIT (auto-selected) – Access to restrict offline merge-and-transfer and split checks
- APPLY STORE CREDIT – Access to apply Store Credit (Call Center, WebPOS)
- REDEEM STORE CREDIT – Access to redeem store credit towards a sale
- APPROVE TIP VALIDATION – Access to validate and approve a Tip on a Check
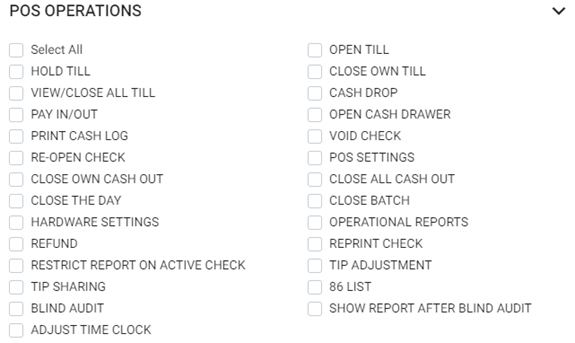
POS Operations
- OPEN TILL – Permission to open the till for cash handling
- HOLD TILL – Permission to hold the till without making any payment or transaction
- CLOSE OWN TILL – Permission to close their own till
- VIEW/CLOSE ALL TILL – Permission to view/close all till
- CASH DROP – Permission to drop Cash from the Cash Drawer
- PAY IN/OUT – Permission to Add or Remove Cash from the till
- OPEN CASH DRAWER – Permission to Open the Cash Drawer under Till Management
- PRINT CASH LOG – Permission to the Print Cash Log
- VOID CHECK – Permission to Void Checks
- RE-OPEN CHECK – Permission to Re-Open Checks from Payment access
- POS SETTINGS – Permission to configure POS settings
- CLOSE OWN CASH OUT – Permission to perform their own cashier cash-out
- CLOSE ALL CASH OUT – Permission to Cash Out for all Employees
- CLOSE THE DAY – Permission to Close the Day
- CLOSE BATCH – Permission to Close a Batch Payment
- HARDWARE SETTINGS – Permission to configure Hardware settings
- OPERATIONAL REPORTS – Permission to the Data and Details of Operational Reports
- REFUND – Permission to issue a Refund for a Check
- REPRINT CHECK – Permission to reprint a Check in POS
- RESTRICT REPORT ON ACTIVE CHECK – Will not have permission to see Active Checks on POS
- TIP ADJUSTMENT – Permission to Tip Adjustment
- TIP SHARING – Permission to Tip Share
- 86 LIST – Menu Item Quantity limitation will be set
- BLIND AUDIT – The Balance will not be shown
- SHOW REPORT AFTER BLIND AUDIT – Will not be able to view the report
- ADJUST TIME CLOCK – Permission to Adjust the Time Clock
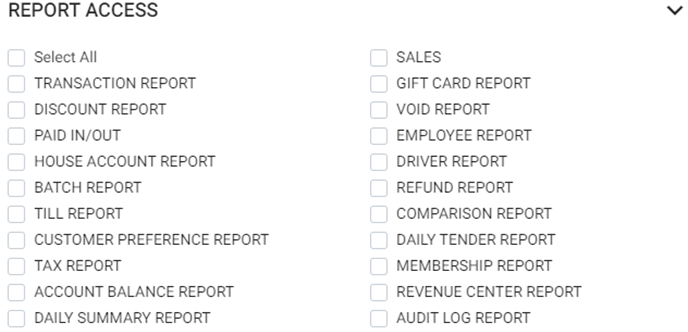
Report Access
- Select the checkbox of each option to have access to that Report.
- SALES, TRANSACTION REPORT, GIFT CARD REPORT, DISCOUNT REPORT, VOID REPORT, PAID IN/OUT, EMPLOYEE REPORT, HOUSE ACCOUNT REPORT, DRIVER REPORT, BATCH REPORT, REFUND REPORT, TILL REPORT, COMPARISON REPORT, CUSTOMER PREFERENCE REPORT, DAILY TENDER REPORT, TAX REPORT, MEMBERSHIP REPORT, ACCOUNT BALANCE REPORT, REVENUE CENTER REPORT, DAILY SUMMARY REPORT, AUDIT LOG REPORT
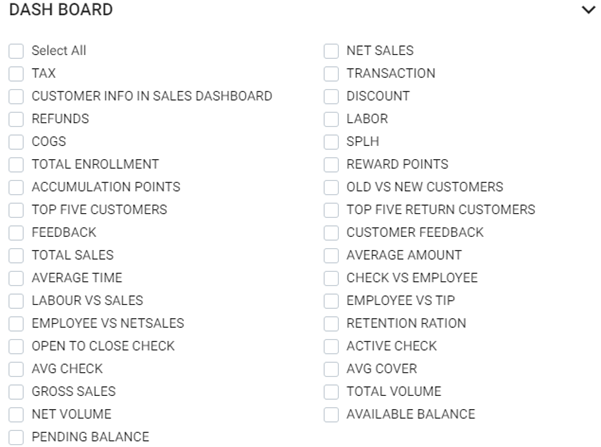
Dash Board
- Select the checkbox of each option to have access to that Dashboard
- NET SALES – Permission to the Net Sales Dashboard
- TAX – Permission to the Tax generated from the sales
- TRANSACTION – Permission to the Transactions made from the store
- CUSTOMER INFO IN SALES DASHBOARD – Permission to the Customer info in the Sales
- DISCOUNT – Permission to the Discount dashboard
- REFUND – Permission to the Refund sales dashboard
- LABOR – Permission to the Labor dashboard
- COGS – Permission to the Cost Of Goods Sold (COGS) dashboard
- SPLH – Permission to the Sales Per Labor Hour (SPLH) dashboard
- TOTAL ENROLLMENT – Permission to the Total Enrollment of the employees dashboard
- REWARD POINTS – Permission to the Reward Points dashboard
- ACCUMULATION POINTS – Permission to the Accumulation points access dashboard
- OLD VS NEW CUSTOMERS – Permission to the Old vs New customers dashboard
- TOP FIVE CUSTOMERS – Permission to the Top Five Customers dashboard
- TOP FIVE RETURN CUSTOMERS – Permission to the Top 5 Return Customers dashboard
- FEEDBACK – Permission to the Feedback data dashboard
- CUSTOMER FEEDBACK – Permission to the Customer Feedback dashboard
- TOTAL SALES – Permission to the Total Sales dashboard data for the Store
- AVERAGE AMOUNT – Permission to the Average amount for the store dashboard
- AVERAGE TIME – Permission to the Average time of the employee dashboard data
- CHECK VS EMPLOYEE – Permission to the Checks made by the Employee in comparison to Employee dashboard
- LABOUR VS SALES – Permission to the Labor of the employee vs sales made by the Employee dashboard
- EMPLOYEE VS TIP – Permission to the Employee vs Tips generated by the Employee dashboard
- EMPLOYEE VS NETSALES – Permission to the Employee vs Net Sales of the Store data Dashboard
- RETENTION RATION – Permission to the Retention Ratio of the Customer dashboard
- OPEN TO CLOSE CHECK – Permission to the Open Check to Close Check dashboard
- ACTIVE CHECK – Permission to the Active Check dashboard data
- AVG CHECK – Permission to the Avg Check dashboard data
- AVG COVER – Permission to the Avg Cover dashboard
- GROSS SALES – Permission to the Gross Sales dashboard
- TOTAL VOLUME – Permission to the Total Volume dashboard
- NET VOLUME – Permission to the Net Volume
- AVAILABLE BALANCE – Permission to the Available Balance dashboard
- PENDING BALANCE – Permission to the Pending Balance for the Store
Cash Drawer
- OPEN CASH DRAWER ON HITTING SET/CLOSE TILL – Permission to open the Cash Drawer upon closing the till
- CASH DRAWER FOR CASHIER OUT – Permission to open the Cash Drawer for cashing out the end of the Sale Amount
- CASH DRAWER RESTRICT PAYMENT – Cash Drawer permission will be revoked for the role. It prevents the user to close the sale or accept any form of payment.

Call Center
- OPEN ITEM & OPEN CHECK DISCOUNT – Permission to Open Item and Open Check discounts for call
- APPLY STORE CREDIT – Permission to apply Store Credit (similar to Gift Cards) for the sale
- REDEEM STORE CREDIT – Permission to redeem Store Credit for the sale
- REFUND FOR ONLINE ORDERS – Permission to refund Online Order payments
- REFUND FOR IN-STORE ORDERS – Permission to refund for In-Store Orders (POS)

- When the Role’s permissions are set, click Save at the bottom-right of the pane or (Update if you’re Editing an existing Role). You are returned to the main Roles page.
- When saving a new Role, it will appear in the Roles table.

Related Articles
Back Office: User Role Management (Manager Access: Discount Transfer Void)
Sign into the Back Office and select a Store. On the left-side Navigation Panel, click User Management then click Roles. On the Roles page: identify the Manager (or your operation’s equivalent). Under Actions, click the corresponding three dots (•••) ...
Retail Back Office: User Management - Editing an Existing User
Navigation: Sign into the Back Office. for your Retail Store, then select User Management > Users. On the Users screen: identify the User to be updated and under the Actions column click the corresponding three dots ••• then select Edit. When adding ...
Back Office: User Management - Editing an Existing User
Sign into the Back Office and select a Store. On the left-side Navigation Panel, click User Management then Users. On the Users screen, under the Actions column click the ••• for a User then click Edit. When adding or editing a User, the following ...
Retail Back Office: User Management - Roles
Navigation: Sign into the Back Office for your Retail Store, then select User Management > Roles The Roles page appears, which displays a table of the currently existing Roles within this Retail Store, with the following columns: Create a New Role or ...
Back Office: User Management - Tip Adjustment
Sign into the Back Office. On the left–side Navigation Panel, click User Management then Tip Adjustment. The Tip Adjustment page appears. Select the Billing Date and Employee Type, then click Apply. Billing Date Filter – Select the Billing Date ...