Back Office: Payment Method Settings
Sign into the Back Office.
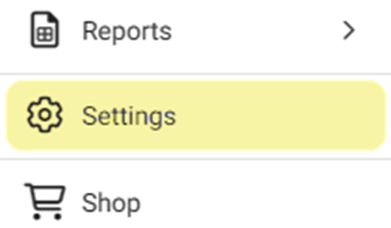
On the left-side Navigation Panel, click Settings. The Settings page appears.
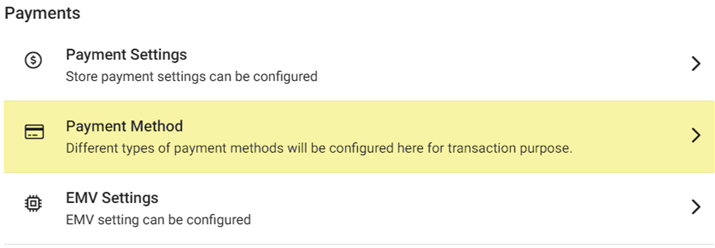
Under Payments click Payment Method. The Payment Method page appears.

If no Payment Methods exist, the message ‘Payment Method not found’ appears.
Actions – Actions to perform on existing Payment Methods. Click Edit (pencil) to view the Payment Method and update if needed - or Delete (trash can) to delete it.
Create a New Payment Method
Click + Payment Method to create a new Payment Method. The New Payment Method pane appears.
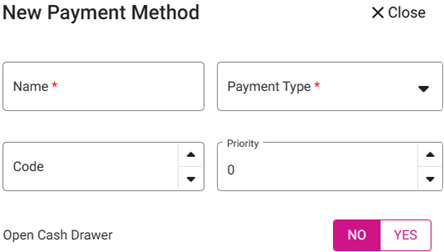
Name – (Mandatory) Enter the name of the payment method. It cannot be greater than 25 characters and will be displayed in POS.
Payment Type – (Mandatory) Select the Payment Type from the dropdown.
Code - Enter the code for this Payment Method (you can use ▲ and ▼ to raise or lower the value by 1). It can be letters or numbers.
Priority - Enter the priority number of the payment method, which determines where it will be displayed in POS.
Open Cash Drawer Toggle – If Enabled (YES), the cash drawer will open for this payment method. If Disabled (NO), it won’t open for this method.
Note: For Payment Types such as Gift Card, Credit Card, Bionet Meal Card, Others, GiveX, NMI Tokenization, Optomany, Ingenico & LPG - options such as Payment Name (Mandatory), Code, Priority and Open Cash Drawer toggles will appear.
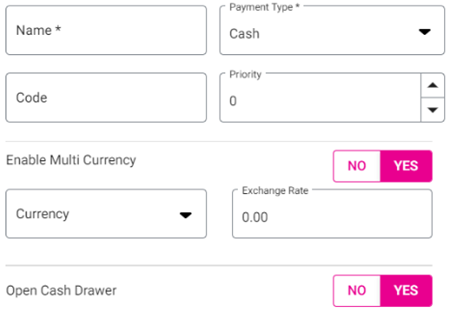
Cash
Enable Multi Currency Toggle – If Enabled (YES), select the Currency from the dropdown, then based on the Currency settings the Exchange Rate value will be set here. If Disabled (NO), no action will take place.
When Cash is selected, the Open Cash Drawer toggle will be Enabled (YES) by Default.
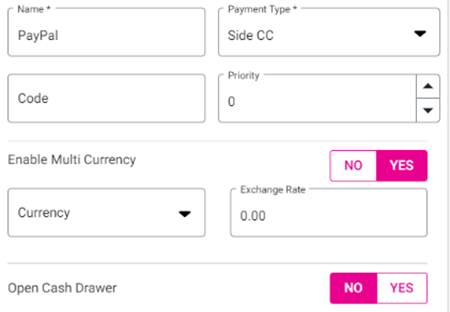
Side CC
Enable Multi Currency Toggle – If Enabled (YES), select the Currency from the dropdown, then based on the Currency settings the Exchange Rate value will be set here. If Disabled (NO), no action will take place.
When Side CC is selected, the Open Cash Drawer toggle will be Disabled (NO) by Default.
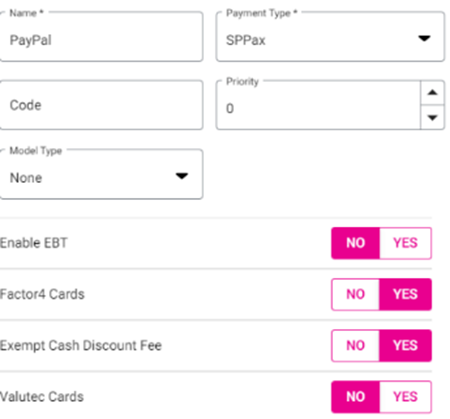
SPPAX
Model Type – Select the Model Type from the dropdown.
Enable EBT Toggle – If Enabled (YES) then EBT will apply. If Disabled (NO), then it won’t.
Factor4 Cards Toggle – If Enabled (YES), the type of Gift Card and Recharge can be made where through SP-PAX swipe a payment can be made (when Factor4 Card will be integrated with SP-PAX). If Disabled (NO), it won’t apply.
Additionally: when Factor4 is Enabled, the Exempt Cash Discount Fee toggle appears. If Enabled (YES), SC will not be calculated for Factor4 Card. If Disabled (NO) [Default], SC will be calculated for Factor4 Cards.
Valutec Cards Toggle – If Enabled (YES), the type of gift card and recharge can be made in that and through SP-PAX swipe a payment can be made (where Valutec cards will be integrated with SP-PAX). If toggle set NO, this will not be applicable.
NOTE: Only one of the Factor4 or Valutec toggles can be Enabled.
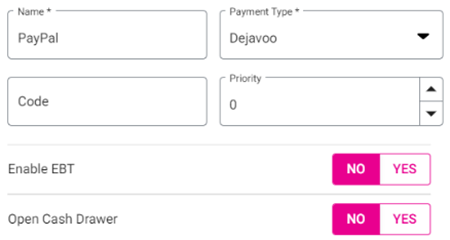
Dejavoo
Enable EBT Toggle – If Enabled (YES), then EBT will apply. If Disabled (NO), EBT won’t apply.
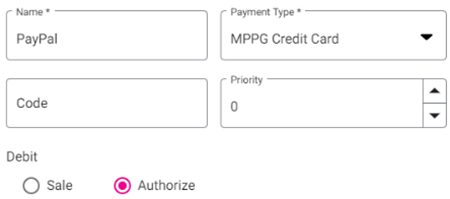
MPPG Credit Card
Select the Debit type (Sale or Authorize [Default]).
Sale – The amount is transferred directly from Customer account to Store account.
Authorize –Tip Adjustment and Batch are made, then the amount is transferred to the Store account.
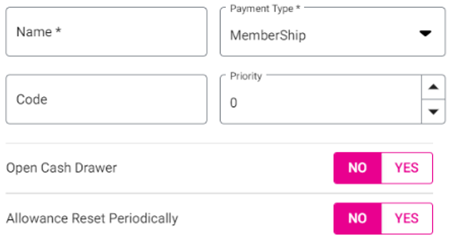
Membership
Allowance Resent Periodically Toggle – If Enabled (YES), the membership will be reset and the previous value will not carry forward. If Disabled (NO), the membership will not be reset, and the previous value will carry forward.
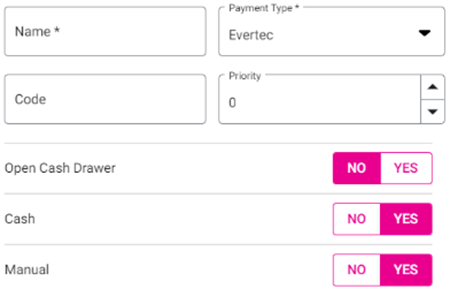
Evertec
Cash Toggle – If Enabled (YES), Evertec cash payment can be made. If Disabled (NO), it can’t be.
Manual Toggle – If Enabled (YES), card payment can be made. If Disabled (NO), it can’t be made.
NOTE: When both toggles are enabled, then when paying through Evertec then payment options for Cash or Manual will appear in POS.
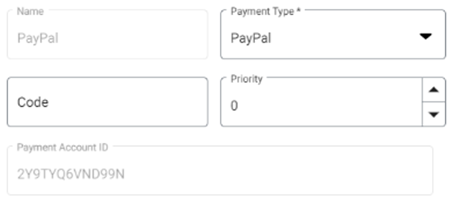
PayPal
The Payment Name will be set to PayPal and is not editable (greyed out). The Payment Account ID will be provided by the PayPal merchant and is also not editable.
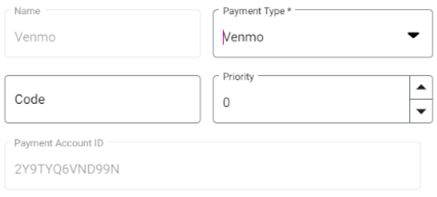
Venmo
The Payment Name will be set to Venmo and is not editable (greyed out). The Payment Account ID will be provided by the Venmo merchant and is also not editable.
Click Save to create the new Payment Method (or Update for an existing Payment Method) and return to the main Payment Methods page. It will be added in POS and appear in the Payment Methods table.
Click X Close at the top right (or Cancel at the bottom left) to cancel creating the new Payment Method and return to the main Payment Methods page.
Related Articles
Retail Back Office: Payment Method Settings
Navigation: Sign into the Back Office for your Retail Store. On the left-side Navigation Panel, click Settings. On the Settings page, under Payments click Payment Method. The Payment Method page displays a table of Payment Methods that were created ...
Back Office: Store Payment Settings
Sign into the Back Office and select a Store (for Enterprise accounts only). On the left-side Navigation Panel, click Settings. On the Settings page, under Payments click Payment Settings. Manual Submit for Credit Card – If Enabled (set to YES), then ...
Back Office: Gift Cards
A Gift Card is a prepaid stored-value money card, usually issued by a retailer to be used as an alternative to cash for purchases at a particular store / business. Sign into the Back Office and select a Store. On the left-side Navigation Panel, click ...
POS: Payment Surcharge - Surcharge
Whenever a Surcharge is selected, the Surcharge Compliance and its Guide will appear. Back Office Navigation: For your Store, select Settings > Payments > Payment Settings When the Payment Surcharge option is enabled and then the Surcharge option is ...
Retail Back Office: Enterprise - Reports
Navigation: Sign into the Back Office. On the left-side Navigation Panel, click Enterprise. Select Enterprise Reports, and the dropdown contains options to access specific reporting Dashboards: Enterprise Reports Sale Report The Sale Report dashboard ...