POS: Side CC Payments
Back Office
Payment Methods
Navigation: For your Store, select Settings > Payments > Payment Method
- The Payment Method Credit Card must be enabled in Back Office.
- When the Admin Credit Card toggle is Enabled, Side CC appears as a Payment Type.
- When the toggle is Disabled, it won't appear.
- When creating a new Payment Method (or updating an existing Payment Method), select Side CC as the Payment Type.
- Service Charge, Surcharge, and Dual Price will work as-usual.
Batch Settings
Navigation: For your Store, select Settings > Store > Batch Settings
For Default Batch Payment, select Side CC.
POS
Creating a Sale
- Select the Payment
option.
- The Payment screen appears, which displays all the payment options enabled in Back Office (BO) settings.
- Select Side CC to perform payment.
- If the Tip screen is enabled, customers are asked to provide a Tip in the form of Percentage (%), Custom amount or proceed with No Tip.
- Below the Tip section, the Signature line will be available based on settings in BO.
- After Tip selection and Signature, there will be 3 options at the bottom.
- Cancel - Payment will be cancelled and you're returned to the previous screen.
- Process Payment - Tap / Swipe / Insert the card into the device, and payment will be completed.
- Manual - The Card screen appears, where the Amount to be paid will be displayed. There are 4 options: Manual, Clear, Process, Cancel, and the amount to be paid is displayed. user can manually enter card details and clicks on process or swipe or tap or insert the card (EMV).
- If no device is connected, the ‘Card reader is not connected’ message will be displayed.
- After payment completion, the Digital Receipt screen appears (if the Show Digital Receipt Screen toggle is enabled in BO). On the Digital Receipt screen, user can choose whether the Receipt / Bill needs to be sent via SMS, Email or Print - then press Send Receipt.
- The Receipt will be sent based on the selection, then the Order screen appears.
Batch/Tip Adjustment
When the Side CC option is selected in BO: the chosen device name will be displayed as the default option in the Batch/Tip Adjustment screen. You will be able to apply and adjust tips for the Side CC payments.
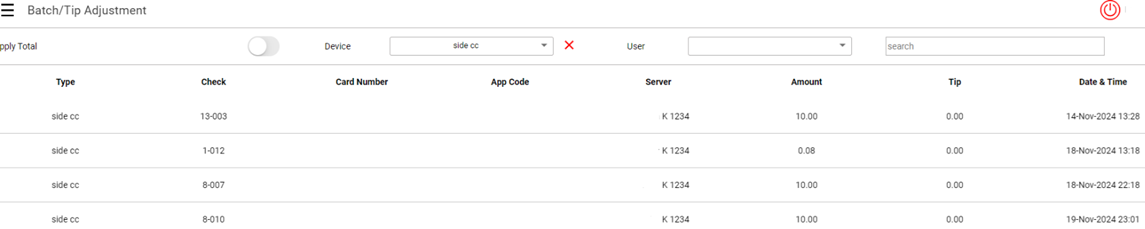
When the Close Day process is completed, the Side CC payment transactions in the Batch/Tip Adjustment screen will be removed.
Note: When the partial payment is made by Side CC and the remaining amount by SPPAX: then upon submission of the Batch, only the SPPAX payment will be submitted. The Side CC payments will be retained. It will be removed from the screen only when the Close Day process is completed.
Side CC Multi Currency
The payment can be completed by using either local cards or the international cards.
- If payment is made through an international card, the conversion value of the bill will appear during the Card payment (as it exists for Cash payments). If required, the user will be allowed to change the Exchange Rate” FC Value” without deleting the payment method from the settings screen.
- Example: If the bill amount is $100 and payment is made with an Aruban Florin card, then the system should display the converted rate of 179.90 AWG while selecting Swipe CC as the Payment Mode.
Impact to POS
While selecting Side CC as payment: a pop-up will appear, where the Service Charge will be applied based on the type of Card selected during the payment process.
The Exchange rate of the selected payment option will be enabled by default, and the foreign Currency code can be changed if needed.
Note: The payment mode Side CC can be created for multiple currency and the exchange rate will be defined in BO. The payment pops up on the iPad, and will have all the Payment Names created for Side CC. The exchange rate for the selected Currency code will appear by default.
Related Articles
Retail POS: Side CC Payments
Back Office Payment Methods Navigation: For your Store, select Settings > Payments > Payment Method The Payment Method Credit Card must be enabled in Back Office. If the Credit Card toggle is Enabled, then Side CC appears as a Payment Type option. ...POS: Clover Payments
Configuration in Back Office Admin On the Admin page, enable the Clove Payment toggle (set to YES). Configuration in Back Office Navigation: Select Settings > Payment > Payment Method Payment Method When creating a new Payment Method (or updating an ...POS: Payment Surcharge - Surcharge
Whenever a Surcharge is selected, the Surcharge Compliance and its Guide will appear. Back Office Navigation: For your Store, select Settings > Payments > Payment Settings When the Payment Surcharge option is enabled and then the Surcharge option is ...POS: Operation - Till Management
Navigation: Log in to POS, then select Operations > Till Management Till is the money trays that fit into the Cash Drawers. They help Owners and Managers to keep track of the Cash that passes through their business daily. When ordering from the Order ...POS: Operation - Customer Display Hardware Settings
Back Office CDS Back Office Settings For more information, see the Back Office CDS Settings Knowledge Article. License Settings Navigation: Log into Enterprise, then select Licenses > License Settings To integrate CDS with the POS of a Store: the ...