Retail Back Office: Dashboard - Schedules
Navigation: Log into the BO for your Store, then on the Home page Dashboard select Schedules
You can view all the Schedules for the current week:
Scheduled Hours
It will show total hours scheduled for an Employee.
Schedule Est. Wages
It will shows estimated amount of wages during scheduled hours.
Actual Hours
The actual hours will appear only when they are non-zero.
Actual Wages
The actual wages will appear only when they are non-zero.
Week Schedule Table
- The week table will appear from current Day to a Week.
- The Date appears under the Day.
- The Schedules you create in Scheduler will appear in the Week Schedule table.
- If Hours is scheduled in the week that will appear under the day that was scheduled.
- If Multiple Schedules are made, then they will appear.
- On the Schedule: the Role Name, Hours and Time will appear.
Month Schedule Table
In the table all Schedules made during the Month will appear below the Date.
- You can change the Month table by clicking right and left arrow.
- Click Today
to view the schedules for the current Date.
Shift History
- When you click on a Schedule, the Shift History page appears which displays details of the Shift
- Such as when the Shift was created and published, the Role the Shift is assigned to, and the Time and Date of any Meal/Rest Break.
Swap Shift
If you click Swap Shift:
- The Shift Swap window appears which contains Dates. Select the intended Date to where you intend to swap the Shift.
- The Shift Swap Confirmation pop-up appears, with YES and No options (along with X Close).
- Click YES to swap the shift. The 'Swap request sent to manager for approval' confirmation appears, and an Approval Request will be sent to the Employee's Manager.
- This will be added to Notifications and Messages.
- If NO, shift will not be swapped.
- If you attempt another Swap when a Swap already exists, the message 'Swap already Exists' appears.
Notifications and Messages
All the Notifications and Messages will appear here. Messages will include the Date they were received.
View All Messages
If you wish to see all the messages, click View All Messages to view the messages. A separate Messaging window will appear.
Messaging
Schedules allows you to communicate with each other through the Messaging functionality. It contains the following tabs:
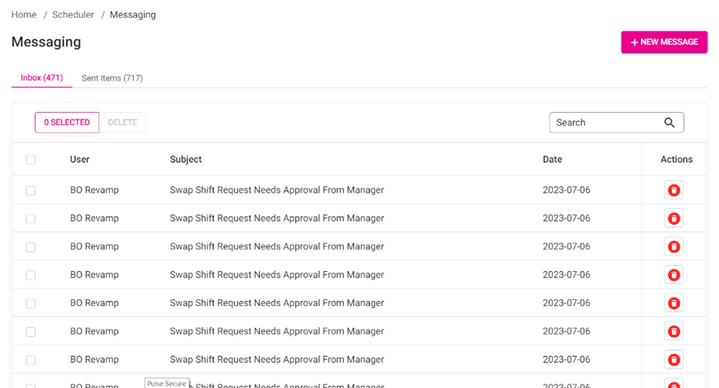
- Inbox – Displays all messages received.
- Sent Items – Displays all messages sent by you.
Send a New Message
- Click + New Message. On the New Message window that appears:
- In the To: field, select the Employee to whom the message will be sent.
- Enter the Subject line of your message.
- Below the To: field, enter the content of your message.
- Once all fields have been filled, click Send to send the message to the Employee.
Open a Message
An incoming message can be read by clicking it. A new pop-up containing the content of the message will appear along with Reply and Cancel options.
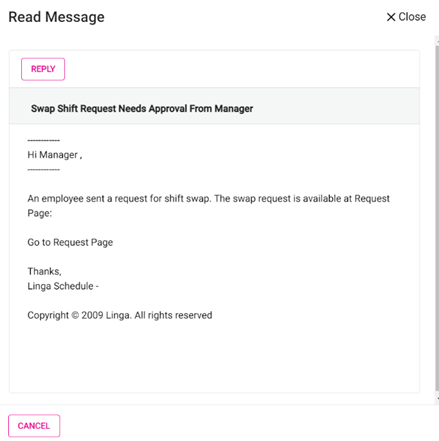
- Reply – You can reply to the message by clicking Reply.
- Cancel – Click Cancel, and it will go back to previous screen.
- Close – Click Close the current screen and return to previous screen.
Delete a Message
Under the Actions column, click the trash can icon. The Delete pop-up appears which shows with Cancel and Delete option below.
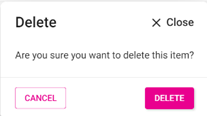
- Upon clicking Delete, it will be deleted.
- Upon clicking Cancel, the pop-up will be closed.
Related Articles
Retail Back Office: Enterprise Dashboard
Navigation: Sign into the Back Office. On the left-side Navigation Panel, click Enterprise. For a moment, your data will load while the banner ‘Please wait while preparing your enterprise metrics’ appears. Then, the Enterprise page is populated. On ...Retail Back Office: Admin - Dashboard
Navigation: Log in to Dealer Admin, then select Dashboard. On the Dashboard, you will be able to view the tiles displaying amounts such as the number of Stores using types of plans Core/Basic, Pro, and Enterprise - as well as Sales data broken down ...Retail Back Office: Dashboard - Inventory
Navigation: Log into the BO for your Store, then on the Home dashboard select Inventory The Inventory dashboard appears. Select the Time Period from the dropdown, then click Apply. The Inventory dashboard will appear for that selected Time Period. ...Retail Back Office: Dashboard - Summary
Navigation: Log into the BO for your Store, then on the Home page Dashboard select Summary. Select the Time Period from the dropdown, then click Apply. The Summary dashboard will appear for that selected Time Period. You will be able to view the ...Retail Back Office: Dashboard - Sales
Navigation: Log into the BO for your Store, then on the Home page Dashboard select Sales The Sales dashboard appears: Select the Time Period from the dropdown, then click Apply. The Sales dashboard will appear for that selected Time Period. You will ...