Retail Back Office: Exchange Reports
Navigation: Log in to the Back Office for your Retail Store, then select Reports > Exchange
The Exchange Report page that appears will display Today's data by default, but you can select a Time Period from the dropdown and select any Date(s) if necessary, then click Apply.
Exchange Report Table
The below table will populate with data based on the Time Period selection.
- If there is no data for the selected field, the message 'No transaction for the selected time period' will appear in the table.
It will be organized by rows for the original Item and the new Exchanged Item with the following columns:
- Receipt Number - The receipt number for the Item or Exchange Item. If clicked, the Receipt Details screen appears (see more information further down this article)
- Sold Date (Item only)- The date of sale for the Receipt [DD-MM-YYYY format]
- Exchanged Date (Exchange Item only)- The date the item was exchanged [DD-MM-YYYY format]
- Item Name - Name of Retail item Exchange in the Receipt
- Quantity - Quantity of Retail item exchanged in the Receipt
- Amount - Total amount of the Retail item
- Tax - Total tax amount exchanged for the Retail item should appear for selected time period
- Discount - Total amount of discount Exchanged for the Retail item should appear for selected time period
- Exchange Reason - Exchange Reason provided by you when exchanging the Receipt
- Opened By - Name of employee who opened the Receipt
- Exchanged By - Name of the employee who exchanged the Receipt
- Total - Appears as the bottom row and provides the sum of the following columns: Quantity, Amount, Tax and Discount.
Item Receipt Details Screen
When a Receipt Number on the main table is clicked, the Receipt Details screen appears. At the top is the < Back button to revert to the main table, along with the Number of the selected Receipt. Below is the option to email a copy of the receipt, then sections for Receipt Summary, Order Summary, Tax Summary, and Payment Summary.
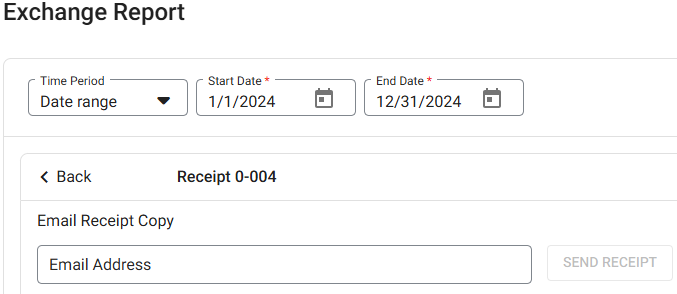
Email Receipt Copy
Below is the ability to Email a Copy of the Receipt. Enter an Email Address in the field (must be a valid email address with a maximum of 50 characters) then click Send Receipt. Once sent, the 'Email Sent Successfully' message appears at the upper right.


- The email will contain the subject line 'Receipt From [Retail Store Name]'
Receipt Summary
Displays the following details:
- Receipt Number – The Number of this selected Receipt
- Customer – The Name of the Customer
- Date – The Date and Time the Receipt was created [DD-MM-YYYY 00:00 AM/PM format]
- Employee Name - The name of the Employee who oversaw the transaction
- Discount - Any Discount amount applied to the transaction
- CC Service Charge - CC Service charge foe Credit card
- Total - The Total amount collected for the Receipt
- Cash Discount - Any amount of Cash discount applied to the transaction
- Item Service Charge - Item service charge amount
Order Summary
Displays the following details:
- Item - The name of the Retail item that was ordered
- SKU - The SKU code of the Retail item
- Price - The Price of the Retail item
- Qty - The Quantity of the Retail item on the transaction
- Amount – The value of the formula: Price x Quantity
- Sub Total – The sum of the value(s) in the Amount column
Tax Summary
Displays the following details:
- Type - Type of the Tax in the Receipt
- Rate % - The Percentage rate of the Tax
- Amount - The value of the Tax added to the transaction
- Total - The sum of the value(s) in the Amount column
Payment Summary
Displays the following details:
- Note: If there are multiple payments on the transaction, then all of them will appear.
- Payment No - The Payment Number on the Receipt
- Type - The type of payment (Cash, CC, etc)
- CC Service Charge - If customer used Credit card, then any applicable CC Service Charge deducted will appear
- Amount - Amount paid on the Receipt
- Status - Status of the Receipt (success or failed)
- Auth Code - The Authorization Code of the Receipt
- Transaction No - The Transaction Number of the Receipt
- Payment Ticket - A link to download the Payment Ticket in PDF format
Exchange Receipt Details Screen
When a Receipt Number for an Exchange Receipt on the main table is clicked, the Receipt Details screen appears. At the top is the < Back button to revert to the main table, along with the Number of the selected Exchange Receipt. Below is the option to email a copy of the receipt, then sections for Receipt Summary, Order Summary, Exchange Summary, Tax Summary, and Payment Summary.
Email Receipt Copy
Below is the ability to Email a Copy of the Receipt. Enter an Email Address in the field (must be a valid email address with a maximum of 50 characters) then click Send Receipt. Once sent, the 'Email Sent Successfully' message appears at the upper right.
- The email will contain the subject line 'Receipt From [Retail Store Name]'
Receipt Summary
Displays the following details:
- Receipt Number – The number of the selected Receipt (the same at the top next to the < Back button)
- Customer – The name of the customer
- Date – The Date and Time the Receipt was created [DD-MM-YYYY 00:00 AM/PM format]
- Employee Name - The name of the Employee who oversaw the transaction
- Discount - Any Discount amount applied to the transaction
- CC Service Charge - CC Service charge foe Credit card should appear
- Total - The Total amount collected for the Receipt
- Cash Discount - Any amount of Cash discount applied to the transaction
- Item Service Charge - Item service charge amount
Order Summary
Displays the following details:
- Item - The name of the Retail item that was ordered
- SKU - The SKU code of the Retail item
- Price - The Price of the Retail item
- Qty - The Quantity of the Retail item on the transaction
- Amount – The value of the formula: Price x Quantity
- Sub Total – Sum of the value(s) in the Amount column
Exchange Summary
Displays the following details:
- Item - The Item exchanged as part of the transaction
- Price - The price of the exchanged item
- Qty - The quantity of the exchanged item
- Amount – The value of the formula: Price x Quantity
- Subtotal – The sum of the value(s) in the Amount column
Tax Summary
Displays the following details:
- Type - Type of the Tax in the Receipt
- Rate % - The Percentage rate of the Tax
- Amount - The value of the Tax added to the transaction
- Tax Total - The sum of the value(s) in the Amount column
Payment Summary
Displays the following details:
- Note: If there are multiple payments on the transaction, then all of them will appear.
- Payment No - The Payment Number on the Receipt
- Type - The type of payment (Cash, CC, etc)
- CC Service Charge - If customer used Credit Card, then any applicable Service Charge deducted will appear
- Amount - Amount paid on the Receipt
- Status - Status of the Receipt (success or failed)
- Auth Code - The Authorization Code of the Receipt
- Transaction No - The Transaction Number of the Receipt
- Payment Ticket - A link to download the Payment Ticket in PDF format (Exchange will be specified)
Impacts to Store Reports
The Exchange Report impact the below mentioned reports:
- Department
- Category
- Subcategory
- Retail/Retail Item Report
- Hourly Sale
- Daily Sale
- Sale Recap
- Cashier Out
- Weekly Summary
- Sale Summary
- Transaction, HA, Till, Comparison
- Customer Preference
- Daily Summary
- Membership Statement
- Revenue Center
- Account Balance
- Tax and Inventory Reports - Master Stock, Consumption Log, Compare Inventory, Count Sheet, COGS, Matrix Report
Exchange Scenario
- If a product is exchanged and the new product has less value, then the remaining Amount will be paid to the customer and will impact the Refund and Exchange reports.
- An Apple was purchased on 4/12 and was exchanged for an Orange on 4/13.
- If the report is run on 4/12 (before the exchange) the item will appear as Apple on the report.
- If the report is run after exchanging on 4/13 the item will appear as Orange. After exchanging the Apple: all the parameters will be based on the exchanged product (orange) on the impacted report such as Tax, Service Charge, Discount etc.
In Inventory Reports
Counts in the Inventory Reports will be increased and decreased based on the consumption and restock of the item(s).
Related Articles
Retail POS: Multi Currency Payments
Back Office Payment Methods Navigation: Log into BO and select a Store, then select Settings > Payment Methods When creating a new Payment Method (or updating an existing one): The Payment Type must be set to Cash for the Multi Currency payment ...Retail Back Office: Membership Reports
Navigation: Log into the Back Office for your Retail Store, then select Reports > Membership. The Membership report page contains the following tab options: Membership Summary Membership Statement Membership Summary Displays the details of a ...Retail Back Office: Refund and Exchange Period Settings
Navigation: Sign into the Back Office for your Retail Store. On the left-side Navigation Panel, click Settings. On the Settings page, under Retail POS click Refund and Exchange Period. The Refund and Exchange Period Settings page enables you to ...Retail Back Office: Enterprise - Reports
Navigation: Sign into the Back Office. On the left-side Navigation Panel, click Enterprise. Select Enterprise Reports, and the dropdown contains options to access specific reporting Dashboards: Enterprise Reports Sale Report The Sale Report dashboard ...Retail Back Office: Employee Reports
Navigation: Sign into the Back Office and select a Retail Store, then select Reports > Employee The Employee Reports page displays a comprehensive set of data on the activity of the Store's employees, with tabs for the following: Attendance Role ...