POS: Membership Payments
Membership gives the ability to organize Customers into Loyal Customers. By using Membership Account, you will be able to organize and apply Tax exemptions to Members of the group, maintain the Account Balance, and issue Allowances.
Membership Process
- Membership Type creation
- Membership Plan creation
- Mapping the Membership Plan with the Customer
- Account creation
- Defining the Payment Method at the Admin Level
Back Office Overview
- The Membership payment type will be included in the Account details of the Super Admin.
- The Include Membership option is included in the Department Menu.
- Menu to create the Membership plan and Account in BO at both account and the store level.
- You can define the Discount for membership plan.
- There is a Report to View the Summary and Statement for Membership Plan.
- You will be provided with an option to create the Membership Plan and the Membership Account at both Account and Store levels.
- If the Customer has a Membership Plan at Enterprise Account and a plan in Store A, then the Customer can't utilize the Membership Allowance created at the Enterprise Account level in Store A.
- In the Enterprise Account Level Membership Plan, you will be allowed to select the multiple stores in the drop down. Customer from selected store from the drop down can use membership payment method.
- In Customer Master - you will be allowed to select more than 1 membership plan. A maximum of 1 Enterprise Account level membership plan can be mapped, while multiple membership plan for Store level.
Payment Settings
If configured at the Admin level, the new Membership option will appear as a Payment Method.
Navigation: Log into BO, and for the specific Store select Settings > Payments > Payment Method
When creating a new Payment Method (or updating an existing one): the Allowance Reset Periodically option will appear under the Membership payment and will be disabled (set to NO) by default.
- If the option is enabled, then the allowance of the member will be reset periodically
- Example: If Member A has the allowance $1000 for a quarterly period, then the Allowance will be reset to $1000 after the completion of 3 months. The Allowance balance will not be carried forward to the next quarter.
- If disabled, then the allowance of the member will not be reset
- Example: If Member A has the allowance $1000 for a quarterly period, then the Allowance will not be reset, and the member can use it until he spends $1000.
Membership Auto Renewal
Navigation: Log into BO, and for the specific Store select Settings > Application Settings > General Settings
- If Enabled (set to Yes), the Membership plan can be auto-renewed.
- If Disabled (set to No), it can't be auto-renewed.
Departments
Navigation: Log into BO, and for the specific Store select Product/Items > Departments
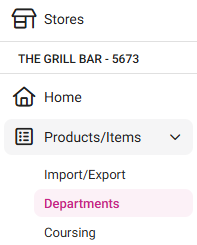
- The option Include Membership will be displayed for each Department and will be disabled by default.
- When the option is enabled, the value for the items in the selected Department will be charged from the Membership payment.
Membership Creation
Price Level for Membership Type
Back Office
The Membership Type will have an option for Price Level which can be chosen accordingly for a Menu Item.
Impact in POS
POS will update the BO with the price levels selected for the menu items. When a Member Customer is attached to the Check, the POS will take the Price Level mapped for that Customer's Membership Type.
- If there is no mapping of price levels, the Default (Price Level 1) price will be taken.
- If the menu item 1 has the price level 7, and the menu item 2 has the price level 5, and the membership type has the default price as 7, then the menu item 1 must take the price level 7 and the menu item 2 must take the default price.
The price levels sent by the POS will be recorded in the menu item's Sale report in BO.
- Example: If Price Level 2 membership type is chosen in BO, then in the POS, when a membership customer selects a menu item, the price displayed should reflect the amount set for Price Level 2.
- If a non-membership Customer selects the same Menu Item, the default price level amount will be applied.
Role Restriction to Access Memberships
- Only users with access can add or remove memberships from Customers in POS.
- If a user doesn't have access but tries to add/remove a Customer: the application will ask to input a Manager's credentials (PIN or Username and Password) to proceed with the action.
The Membership Accessibility toggle will appear in the POS menu when creating or updating a Role under the User Management > Roles page of a Store.
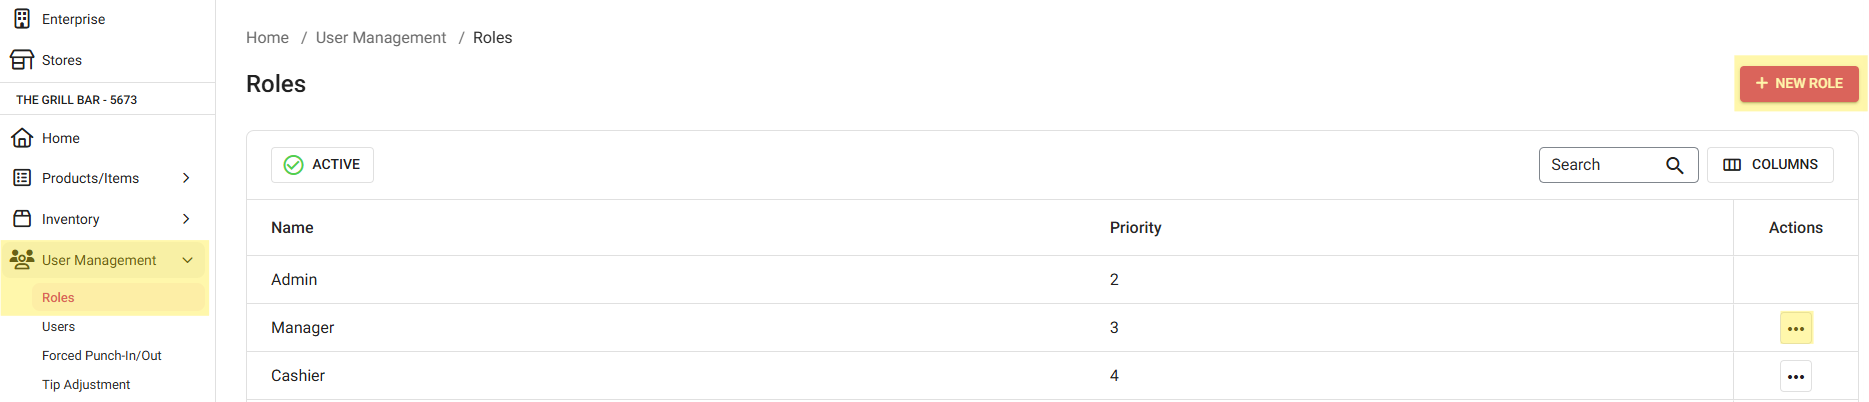
If the Membership Accessibility option is enabled (box is selected), any user with that Role will be permitted to add / remove Membership to/from Customers.
If a User has multiple Roles: the Role they're currently logged in as will be considered.
- Example: a user has 2 Roles (Manager [has Membership access] and Cook [no Membership access]). When logged in as a Manager, the membership customer and membership payment will be available and vice versa.
- Users without Membership access are not allowed to process a Membership Payment without the input of a Manager PIN.
Implementation in POS
- The Membership Account Payment Mode toggle must be enabled for Membership customers.
- For Membership customers: the system will validate any Membership Discount if configured in Back Office. If any exist, then the system will apply it.
The Membership discount will be validated only for the customers to whom the respective membership plan is attached.
When adding an Item to the Check: the system will validate whether the selected Customer has any Membership Discount, and if the Discount is available then system will apply the same while the Item or Check meets the Discount criteria defined in BO.
- Example: Item 1 discount is created with a Membership plan chosen (Monthly New) configured in BO, then in POS:
- The membership customer selects it.
- Places the membership menu item.
- Clicks the Item 1 discount.
- The discount will be applied to the Check.
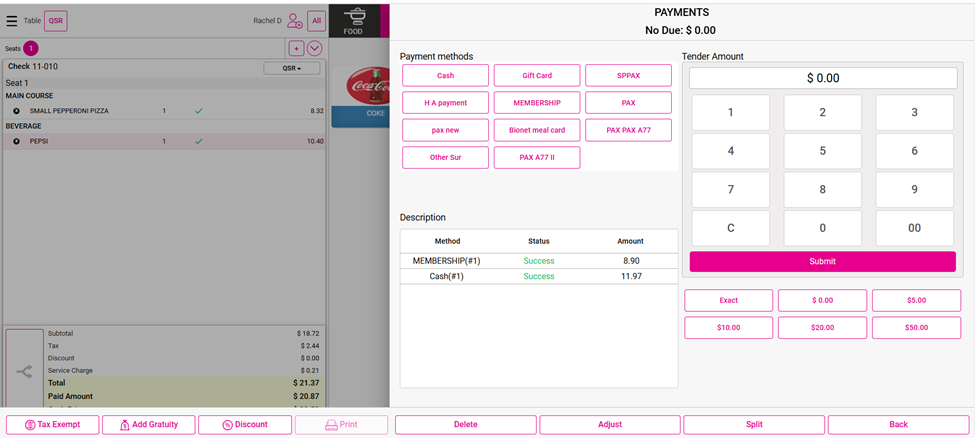
- When any Order is made in POS, you will be able to choose Membership as payment method. When chosen, you will be able to make full or partial payments.
- When 2 menu items are added - and for one of them Membership can apply - then for that menu item alone the membership payment option will be available.
- Example:
- Sandwich is a membership menu item while Coke is a normal menu item on the same Check.
- The customer intends to pay with Membership.
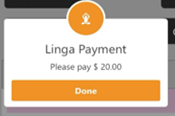
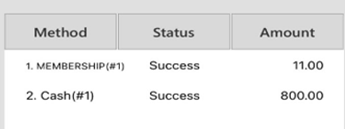
- The Sandwich will be paid via Membership, while the remaining amount for the Coke will be paid normally, with a pop-up containing the message 'Please pay $ 3.43' - with the Done button - appears.
- The Coke amount of $3.43 amount is paid by other payment method.
- The Check will have a $0.00 balance and Close as shown as below screen.
- Membership payments can be deleted.
- When a selected item is not linked with a membership (Department should be mapped for that linked category/subcategory/menu item) then a pop-up with the error message 'Please check if the menu items placed is a membership menu item' appears. When clicking Done, the pop-up box will close.
- When a membership customer is not attached when attempting to make a Membership payment, a pop-up with the error message 'Please check if the menu items placed is a membership menu item' appears. When clicking Done, the pop-up box will close.
- When particular membership plan is not activated (if issue date is set for some other day) for that customer but Membership payment method is chosen, then a pop-up with message will be displayed when. When clicking Done, the pop-up box will close.
- When the cart value is higher than the membership amount and Membership is selected as the payment method: the card detail screen will be displayed and then the insufficient balance message will appear. In this case, the user can also make a partial payment.
- If yes is selected, the partial payment is allowed to proceed.
- If no, select that pop -up box will be closed.
- When Membership is selected as the payment method and the card detail screen appears: when entering the details but there are no funds to complete the payment then a pop-up with the message 'You don't have enough balance to process the payment' appears. After clicking Done option, the pop-up box will close.
- When a Plan has expired and not yet renewed then the below message will be displayed. When clicking Done, the pop-up box will close.
Customer Profile Screen
When a Membership Customer's profile is chosen: the Customer Profile screen appears. Here you can view the Customer's previous Orders, along with the following information (for a Membership account):
- Member's Account Types (Membership)
- Member's Name
- Balance Amount of the Member's Account
- Member's Card Number / Resident Code
- Membership Name
- Issue Date
- Expiry Date
- Child Members
- When there is no Child Member for that Customer, it shows as below:
- Recharge (editable). You can enter the membership recharge value then click Update. Once clicked, the recharge amount will be added to the existing Membership Balance and this updated amount will be displayed in BO too.
The BO/iPad data cannot be edited in iPad except Recharge details.
Adding a Membership from POS
You can include a Membership for any customer from the POS screen.
- Choose the Customer to which the Membership need to be included
- Choose the Membership Type (drop-down list shows all the membership that are relevant to this store)
- Enter the Card Details
- Select the Membership Name, Membership Type, Issue Date and Expiry Date.
- Enter the Recharge amount.
- Any Child Member can be attached to this Customer but only from BO.
- This POS created Customer Membership will also be reflected in BO.
- Reminder: Once created, only the Recharge field of a Customer's Membership can be edited.
Note: You can include a Membership for any customer in POS using their Membership card or by entering their Membership number.
Check Option Scenarios
Tax Exempt: Allows Membership payment.
Open Item: Does not allow Membership payment. If attempting to create an Open Item and Membership payment is selected, a pop-up with the message 'Please pay [Amount]' appears.
Another payment must be chosen before payment can be completed.
Gratuity: Does not allow Membership payment. If attempting to add Gratuity and Membership payment is selected, a pop-up with the message 'Please pay [Amount]' appears.
Another payment must be chosen before payment can be completed.
Gift Card: Does not allow Membership payment. If attempting to Recharge and Membership payment is selected, a pop-up with the message 'Please pay [Amount]' appears.
Another payment must be chosen before payment can be completed.
Voiding an Order
If the membership Menu Item has been sent to the kitchen but it needs to be removed, you will need to void the item(s).
If the Order has been sent to the kitchen:
- Press the Void button. The Void Reason pop-up appears.
- Select any one of the pre-defined Reasons configured in Back Office or manually type a Reason in the text box at the bottom.
- After providing the Void Reason, press Add at the bottom-right.
- The Menu Item(s) will be voided. Other functionality will work as-usual.
Tip Functionality
After selecting the payment, the Tip screen appears. Select the tip then make the Payment. The Menu Item price + Tip Amount will be added with membership payment success.
Refund
Refund is the repayment of money to the customer.
To navigate to the Refund screen, select Operations > Refund.
- Note: You won't be able to submit a Refund until a Reason for the refund is provided.
You can Refund the full price for a Check by using this option.
- Select the payment type.
- Provide Reason for refund. The Amount to be refunded will appear.
- When entering the Refund amount then selecting a Payment Type: a confirmation message appears - with Yes and No options.
- If No is selected, the pop-up will be closed and the Refund process will be cancelled.
- If Yes is selected, the pop-up will be closed and a 'Success' message will appear upon the completion of the Refund process.
- Once Process is selected, the 'Refund success' pop up appears. Click Done to close the pop-up.
Offline Scenario
- Offline scenario won't work for the Membership feature.
- If attempting to use Membership payment while offline, a pop-up with the message 'Internet appears to be offline...' appears. Click Done to close the pop-up.
- This applies to all Service Types.
Receipt Printing
Front End Receipts
Navigation: For a Store, select Settings > Printer Templates > Front End Receipt
On the Front End Receipt page, under Order Summary, the Show Membership Balance appears and will be disabled (not selected) by default.
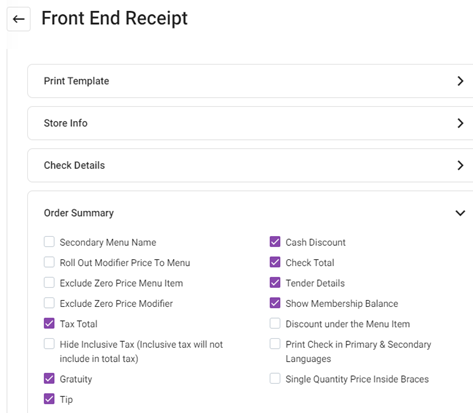
- If enabled, the print preview will show the Membership Plan Balance details.
Impact To Receipt Prints
- The membership balance will appear, only if the customer makes the payment for the order using a membership payment.
- The remaining balance will be updated and shown in the receipt print if the Show Membership Balance option is enabled in BO settings.
- The used overdraft amount should be shown separately in the receipt only when the membership allowance comes to zero.
- Note: If the Print Membership Balance box is selected, the Membership balance will appear on both Customer and Merchant copies.
Itemized Receipts
Navigation: In the Back Office for a Store, select Settings > Printers > Receipt Printers
- On the Receipt Printers page, under the Settings tab, set the Enable Itemized Receipt toggle to YES.
- When enabled, it will produce itemized receipts.
Related Articles
Retail POS: Membership Payments
Membership gives the ability to organize Customers into Loyal Customers. By using Membership Account, you will be able to organize and apply Tax exemptions to Members of the group, maintain the account balance, and issue allowances. Membership ...POS: Payments - Offline Mode
POS Navigation: Log into POS, then select POS Operations > POS Settings On the POS Settings page: the Offline Mode toggle appears and will be disabled by default. It is for switching the device from Online to Offline. If enabled, then the system ...POS: GiveX Payments
Back Office Super Admin Navigation: Log in to the Back Office Admin page, then select Accounts > Store Details The GiveX Gift Card toggle must be Enabled (set to YES) on the Super Admin page. Upon enabling this toggle, the GiveX Gift Card can be ...POS: Factor 4 Payments
Factor 4 is a Gift Card and a Loyalty Program provider. They empower businesses of all sizes to identify and monetize Customer Loyalty. This article describes the process of integrating Factor 4. Changes in the Back Office (BO) Navigation: Log into ...POS: Loyalty Payments
For more information on Loyalty programs, see the Loyalty section of the Back Office Add-Ons article. Points Based Redemption Back Office Navigation: Log in to the Admin page On the Admin page, select Accounts. Under the Account Settings section: ...