Retail Back Office: Enterprise Settings - Addons
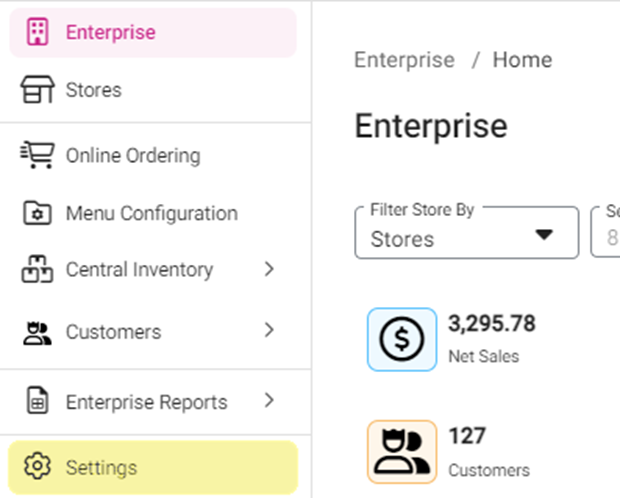
Navigation: Sign into the Back Office. On the left-side Navigation Panel, select Enterprise then Settings.
On the Settings page, under Addons:
Loyalty
Loyalty Settings
Select whether to Enable Loyalty. If Yes:
- Select the Loyalty Currency (Stars [Recommended], Points, Coins, Gold, or Silver)
- Enter your Accumulation settings for Points Earned. Type the amount(s) or use ▲/▼ to increase/decrease the value.
- At Sign Up
- For Each Visit
- Enter the Points per Amount Spent.
- Retail Item Based – To add a Retail Item, click + Retail Item. Select the Retail Item from the dropdown, followed by the Min(imum) Quantity to activate points then the Earning Points.
- To Delete a Retail Item: click the corresponding Trash Can icon then click Delete to confirm.
- Category Based - To add a Category / Sub-Category, click + Category / Sub-Category. Select the Category / Sub-Category from the dropdown, followed by the Min(imum) Quantity to activate points then the Earning Points. To Delete one, click the Trash Can icon then click Delete to confirm.
- Redemption – Select whether Customers will redeem rewards via Points Based or Items Based. If Item Based was selected:
- Click + Add Offer to enter a new Point redemption option.
- To Delete one, click the Trash Can icon then click Delete to confirm.
- Select the Discount Name from the dropdown. Use the Search bar to find an Item.
- Enter the amount of Points needed to redeem the Item offer.
- Enter the Redemption Value of every point earned (in Dollars).
- Enter the Value of Redeeming Points.
- Enter the Value of Minimum Required Points.
SMS Loyalty Settings
- Enter the Message to Invite a Customer to join the Loyalty Program.
- Enter the Message to request the Customer’s Email Address to confirm joining.
- Enter the Message to send Thanks to the Customer.
CDS Advertisement
- To create a new Advertisement, click + Advertisement at the top-right. The New Advertisement pane appears.
- To Edit an existing Advertisement, click the corresponding Pencil icon. The pane to Create/Edit the Advertisement appears.
- Enter the Ad Name.
- Select the Availability:
- Always – The Ad will always be available.
- Days Of Week – Select the Days when the Ad will be available. If there’s any Restriction Time, select Yes then enter the Start and End Times. Select the Level (Stores or Groups) then select the Store(s) from the dropdown.
- Days Of Month – Select the Days of a Month the Ad will be available. If there’s any Restriction Months select Yes then select the Months the ad should not be available. If there’s any Restriction Time select Yes then Start and End Time during the day the ad should not be available.
- Date Range – Select the Start and End Dates the Ad should be available. If there’s any Restriction Days select Yes then select the Days the ad should not be available. If there’s any Restriction Time select Yes then Start and End Time during the day the ad should not be available.
- Specific Date – Select the specific Date the Ad should be available. If there’s any Restriction Time select Yes then Start and End Time during the day the ad should not be available.
- Date Range with Time – Select the Start and End Dates the Ad should be available. Select the Start and End Times during those Days the Ad should be available. If there’s any Available or Restriction Days – or Restriction Times – select Yes, then select the appropriate Days/Times.
- Select the Level (Stores or Groups) then select the Store(s) from the dropdown.
- Banner – The image to represent the Ad. Click the Upload New Image button.
- When ready, click Save to create the new Ad (or Update for an existing Ad).
Developer API Key
API Key
The API Key field appears and will initially be empty. The Copy button is next to it and the Generate New API Key button is below it, along with a count of the Remaining Requests.
- When Generate New API Key is clicked, an API Key will be generated, and you can make an API call using this Key.
- By default, Key Generator key will be grayed out and it will only be enabled when there is no API Key.
- The Remaining Request field displays how many times the API is called, and displays count purchased by you by default.
Upgrade Developer API License
- License Auto Renew
- By default, the toggle will be is disabled (set to NO) and grayed out, and will be enabled only when the API Request Count is set.
- If disabled, the notification 'In order to automatically renew your API Requests, you need to upgrade your license from below for once' will always appear.
- If enabled, the notification 'Auto renewal is active, Please select request count, after then will automatically renew when your request count is below 50' will always appear.
- If the request count is decreased below 50 and the Auto Renew toggle is enabled, then based on the selection in the API Request count the request count will be increased.
- Example: The Count decreased to 49 then 1000 is selected for the API Request Count. The Count will be increased to 1049.
- License Price
- Displays the Price of the API Request Count. For an API Request Count of 100, then a License Price of $1 appears.
- 1000 - $10
- 2000 - $20
- 3000 - $30 (example)
- 4000 - $40
- 5000 - $50
- Update
- Click Update to save the details.
- If Update is clicked but there's no credit card is attached, the alert message 'Your Credit Card was not found' appears.
- If Update is clicked but without selecting a License Count, the alert message 'Invalid license count' appears.
Related Articles
Retail Back Office: Admin - Dashboard
Navigation: Log in to Dealer Admin, then select Dashboard. On the Dashboard, you will be able to view the tiles displaying amounts such as the number of Stores using types of plans Core/Basic, Pro, and Enterprise - as well as Sales data broken down ...Back Office: Enterprise Settings - Addons
Sign into the Back Office. On the left-side Navigation Panel, click Enterprise. Then click Settings. On the Settings page, under Addons: Loyalty Loyalty Settings Select whether to Enable Loyalty. If Yes: Select the Loyalty Currency (Stars ...Retail Back Office: Enterprise Stores
Navigation: Sign into the Back Office for your Retail Store. On the left-side Navigation Panel, click Stores. The Stores page appears, with each tile representing a Store under your Enterprise. Click on a Store's tile to access its Back Office. Note: ...Retail Back Office: Enterprise - Reports
Navigation: Sign into the Back Office. On the left-side Navigation Panel, click Enterprise. Select Enterprise Reports, and the dropdown contains options to access specific reporting Dashboards: Enterprise Reports Sale Report The Sale Report dashboard ...Retail Back Office: Enterprise Settings - Central Inventory
Navigation: Sign into the Back Office. On the left-side Navigation Panel, click Enterprise. Then click Settings. On the Settings page, under Central Inventory, select Inventory Costing. The Inventory Costing page has options to select stores for ...