Retail Back Office: Products/Items - Import/Export
Navigation: Log into the BO for your Store, then select Product/Items > Import/Export
On the Import/Export page, you can Import or Export to handle data.
Download Template
When Complete Sheet is selected, it downloads the Import file (File Name: [Store Name]'s Retail WB.xlsx) in excel format and shows the template of sheet.
Download Data
When Complete Sheet is selected, it downloads the sheet (File Name: [Store Name]'s Retail WB.xlsx) with data.
Import
When Import is clicked, the Import Retail Item pane appears.
- The Complete Sheet option will be auto-selected under Select Sheet Type.
- Click Upload Retail Template.
- Navigate to where your filled-in Template file is saved, select it then click Open.
- Confirm the correct file was selected, then click Import at the bottom-right of the pane.
Import Error
If there's an error with the import:
The Download Error List will appear above the Status, with a link to download a version of the upload file that includes cited errors. The Status will appear as Partially Completed [DD-Mon-YYYY HH:MM AM/PM].

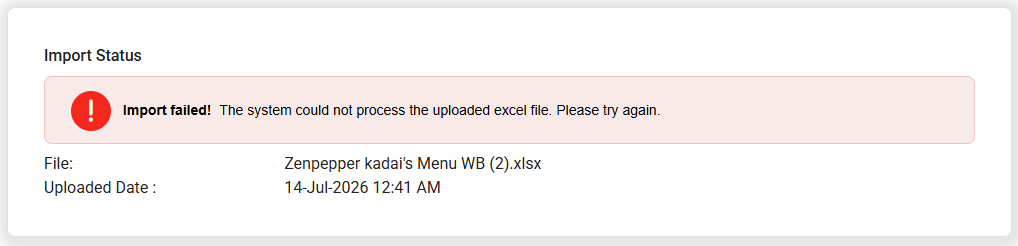
Import Failed
If the import outright fails: the Import failed! banner appears, followed by the File you attempted to upload along with the attempted Uploaded Date.
Variant Item Import/Export
In the sheet under Retail Item new columns Product Type, Attribute One, Attribute One Value, Attribute Two Value, Attribute Two Value, Attribute Three Value, Attribute Three Value will appear in the downloaded sheet.
After downloading the Sheet:
- To add a variant item, then add the Item Name.
- Select a Product Type from the dropdown. Two options will be available (Standard and Variant).
- For the Attribute 1 column, enter the attribute Name such as color, size, etc. as needed.
- For the Attribute 1 Values, enter the values of each entered attribute (Example: for the attribute Color enter Red or Green).
- The tooltip 'For Variant items: Attribute 1 and Attribute 1 value cells are mandatory' appears.
- For Attribute 1 and it's Value(s), if the fields are empty the Item will not be imported.
- If Standard is selected it will not be mandatory.
- Follow the same process for each additional Attribute Name and corresponding Value.
- After filling all mandatory columns in the sheet, import the sheet. If mandatory columns are not filled for the Item, that particular Item will not be imported
- Note: A variant product type can have up to 3 attributes with a maximum of 10 values.
- Once the sheet is imported, the item will be created in the back office and displayed in the product/items module.
- You can view all existing Retail items in Product/Items module.
- Under the right-side Actions column, click the three dots (···) then select Edit to view all Item details imported into the table.
- All values will be populated in the Retail Item table, based on the values provided on the Import Sheet.
- Example: if Color, Size and Design are entered as Attributes for Shirts, they'll have the corresponding Values:
- Red, Small, Floral
- Green, Small, Printed
- For our import example: 8 variant items appear in the table based on the data entered in the sheet including:
- Shirt (Red, small, floral)
- Shirt (Red, small, printed)
- Shirt (red, medium, floral)
- Shirt (red, medium, printed)
- Shirt (green, small, floral)
- Shirt (green, small, printed)
- Shirt (green, medium, floral)
- Shirt (green, medium, printed)
- They're created with SKU Type as Auto, SKU Code, Supplier Cost, Markup percentage and Selling Price - all provided in the sheet.
- The SKU Code will be automatically populated based on the values entered in the sheet.
- The Selling Price and Supplier Cost will be identical for all variant items per the sheet but the selling price can be updated by editing the corresponding field or by importing again. With that update, the SKU Code and Selling Price will be updated in the database.
Export
For our example: when exporting the sheet with all data downloaded, all 8 variant items created in the table will appear separately in the import/export sheet.
You can edit the variant item data. Any edited data will be imported and will be updated for the Retail Item.
Related Articles
Retail Back Office: Products/Items - Products/Items
Navigation: Log into the BO for your Store, then select Product/Items > Product/Items The Products/Items page appears, which displays a table for Retail Items. Create a New Retail Item (or Update an Existing Retail Item) Click + New Retail Item at ...Back Office: Import/Export
Navigation: Sign into the Back Office. On the left-side, select Products/Items then Import/Export. The Import/Export page enables you to configure a Store’s Menu Items via File Upload, and contains the following options: Download Template – Select ...Retail Back Office: Products/Items - Reasons
Navigation: Sign into the Back Office for your Retail Store, then select Products/Items > Reasons The Reasons page is for defining the Reasons an Employee/Manager can select when processing Tax Exempt, Void, Paid In/Out, Over/Shortage, etc. in POS. ...Retail Back Office: Products/Items - Bulk Update
Navigation: Log into the Back Office for your Store, then select Products/Items > Bulk Update The Bulk Update page displays all the Categories/Subcategories and Retail Items created under Products/Items in table view. When no Retail Item has been ...Retail Back Office: Products/Items - Upcharges
Navigation: Log into the Back Office for your Store, then select Products/Items > Upcharges The Upcharges page displays a table containing the Name of each Upcharge under the Store, along with Actions to Edit or Delete. To Delete an Upcharge: click ...