Retail POS: Customer Display Hardware Settings
On the Hardware Settings screen, select the Card Reader tab. The screen displays the device name of the Customer Display which is connected to the POS.
Back Office
License Settings
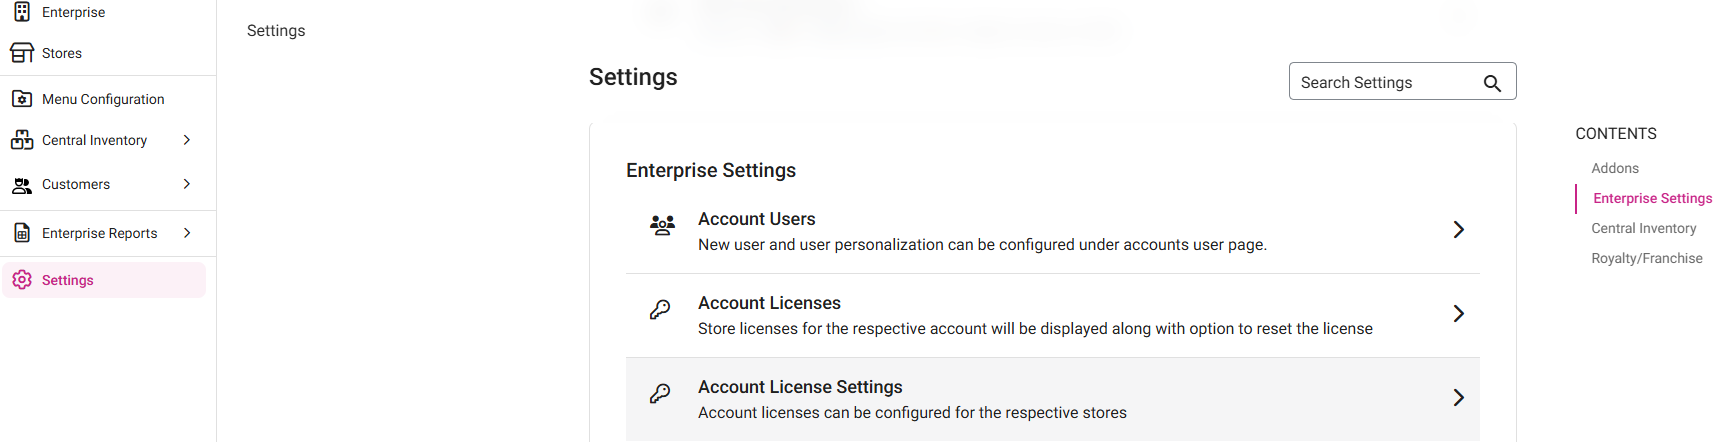
Navigation: Log into Enterprise, then select Settings. Under Licenses select Account License Settings
To integrate CDS with RETAIL POS, the Customer Display toggle must be enabled for the specific Store. Make sure to click Save to apply the licensing change.
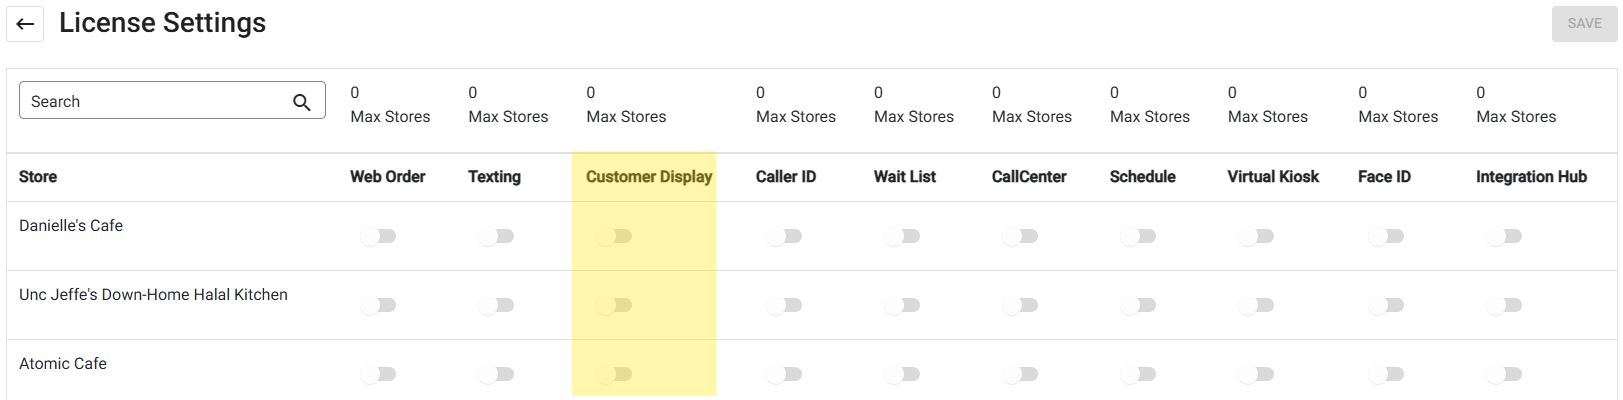
Note: If the toggle isn't enabled for the Store in BO: if attempting to enable CDS in the Retail Store's POS, an alert pop-up with the message 'Enable Customer Display in Back Office' appears.
CDS Settings
Advertisements
For more information on advertisements in CDS, see the Enterprise Add-On Knowledge Article.
Integrating CDS with Retail POS
- Download and install the Cloud CDS Application. Once downloaded, you can view the configuration instructions in the CDS app.
- In POS Hardware Settings, under the Customer Display tab: enter the CDS IP Address.
- If an incorrect IP Address is entered, a pop-up with the message 'Not a valid ip address' appears.
- When the correct IP Address is entered, click Connect. The POS will automatically connect to the CDS. The confirmation message 'The CDS has been successfully connected' will appear in Retail POS.
- If the toggle is disabled (or the CDS WiFi is disconnected, or power is off), the message 'The CDS has been Disconnected' appears in Retail POS. The text box will be greyed out and buttons will be disabled.
- When connections is re-established, connection to RETAIL POS will automatically be restored.
POS
The Card Reader screen allows you to Select a Card Reader. It displays a list of EMV devices configured in the Back Office, with their Name and IP Address.
A selected device will be marked with a check mark ✓.
- If a Card Reader device is selected but it's not connected, a 'Communication Error' pop-up appears. Click Done to close the pop-up.
- Note: This can occur due to a number of reasons, including the wrong IP Address, the Device is turned off, or incorrect Network configuration
Scenarios
- If you disconnect then move to other settings, the IP Address in the Customer Display IP Address field will not appear.
- If the user moves to another setting in the Hardware settings, IP address in the Customer display Ip address field will be displayed.
- If user sign out from account or close the app. CDS will be disconnected.
- If user log in or log out in RETAIL POS. CDS stay connected.
- When the user locks the CDS screen, CDS will be disconnected from RETAIL POS.
Select A Bluetooth Card Reader
- For the dropdown, select Edynamo or Tdynamo.
- For the Bluetooth Pairing Request pop-up that appears, enter 000000 and select Pair.
- Edynamo - the selected device will be marked with a check mark ✓.
- Tdynamo
- Enable Bluetooth on iOS.
- Look for the Tdynamo device from the list of available devices.
- Select the device to pair.
- The selected device will be marked with a check mark ✓.
Customer Sign Up in CDS
Once CDS is connected with RETAIL POS:
- In Retail POS, click Add Customer. The Add Customer screen appears.
- Simultaneously on CDS, a screen to request the Customer's Phone Number will appear. The Customer enters their Phone Number (mandatory), then presses Next.
- Press clear to remove any entered numbers and start Number entry over.
- A full phone number must be entered before Next is pressed.
- On the next screen in CDS: the customer's entered Phone Number appears along with a request for the Customer to enter their Name. Once their name is entered (it will also appear in POS), they press Submit. The Name will appear in POS as well.
- This can also be skipped by pressing Skip below the field.
- Previous can be pressed to revert to the Phone Number screen to enter a different Number.
- A name must be entered before Submit is pressed.
- Upon clicking Submit, the Customer and their entered details will be saved and attached to the store. The confirmation screen will appear in CDS.
Ordering in CDS
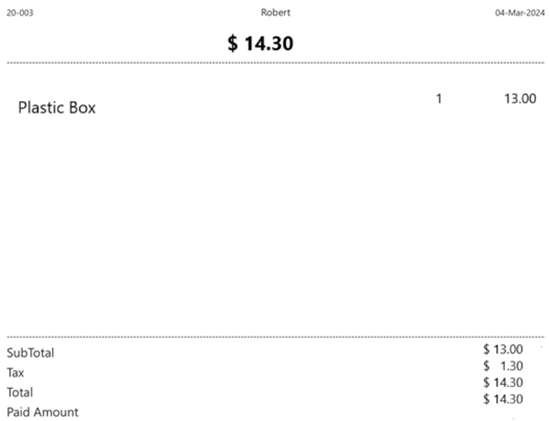
Once CDS is integrated with RETAIL POS, then any Order placed in RETAIL POS end will be displayed in CDS along with its Order and Receipt total.
For the same Retail item in CDS
Payments in CDS
Payment using Cash
- Select a payment option, select Cash payment then click Submit.
- Payment is made and payment will be reflected in the Paid Amount in CDS.
- The cash price will be displayed in Retail POS as well as in CDS for stores for which the Dual Price has been configured in Back Office.
Payment using Credit Card/Gift Card/House Account/Membership
- An order is placed in Retail POS will be displayed in CDS along with its order and Receipt total.
- The tap/insert/swipe screen will be displayed in CDS.
- Dark Theme
- Light Theme
- After entering valid card details (manually, swipe or tap) the loading screen with the message 'Connecting... please do not remove the card' appears in CDS.
- For invalid cards, the error validation pop up will be shown in RETAIL POS not in CDS.
- After successful payment: if the signature pad toggle is enabled in Retail POS Settings, the Please Sign here screen appears in CDS.
- The signature pad will be shown in Retail POS as well
- The customer signs then presses Done. The signature screen will be closed in both CDS and POS.
Payment Using Loyalty
- Customer must be attached to the Order to use Loyalty, which will appear as an option on the Payments screen. The Loyalty [Amount] option is selected and Submit is pressed.
- Payment is made and payment will be reflected in the Paid Amount in CDS.
- Amount will be reflected in Paid Amount in CDS.
- CDS before Loyalty payment
- CDS after Loyalty payment
Payment Using Card readers (Magtek/SPPAX)
MPPG
CDS is integrated with POS, order is placed in POS end will be displayed in CDS along with its order and Receipt total.
- Payment is selected then MPPG payment type is selected then Submit is pressed.
- Once the payment type is submitted, the insert/swipe screen will be displayed in CDS.
- Dark Theme
- Light Theme
- For MPPG - tdynamo, below screen will be shown in CDS.
- Dark Theme
- Light Theme
- In POS, the loading screen with message 'Start EMV Transaction. PRESENT CARD.' appears.
- Once the card is Swiped/tapped/inserted in CDS, the message 'Connecting to processor, please do not remove the card' appears. In Retail POS, the loader with the message 'Connecting to Processor' appears.
- Once payment is made, it will be reflected in the CDS Paid Amount.
- Once payment is completed, the payment confirmation screen appears.
SPPAX
CDS is integrated with POS, order is placed in POS end will be displayed in CDS along with its order and Receipt total.
- Payment is selected then SPPAX payment type is selected then Submit is pressed.
- Once the payment type is submitted, the insert/swipe screen will be displayed in CDS for PAX device.For external CDS, only Dark Theme will be available.
- Dark Theme
- Light Theme
- In CDS, the message 'Connecting to processor, please do not remove the card' appears.
- The customer swipes/inserts/taps the card in the Card Reader, then payment is made and the payment will be reflected as the Paid Amount in CDS.
Payment Summary
In POS
In CDS
In CDS, the overall Total (Receipt Total) and Paid Amount will apply.
Digital Receipt Screen in CDS
Back Office
Enable the Show Digital Receipt in CDS toggle.
CDS
The Digital Receipt screen in CDS displays the following options.
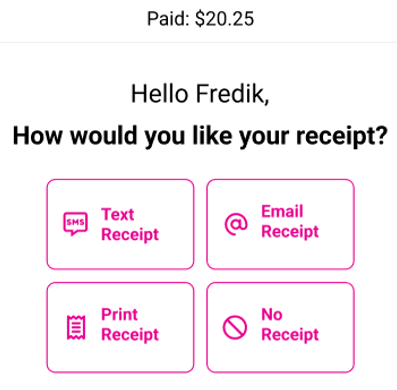
- Text Receipt
- Email Receipt
- Print Receipt
- Screen in POS
Text Receipt
- The screen for the Customer to enter their Phone Number appears (the amount to be paid appears at the top). The Customer enters their Phone Number for receipt generation, then pressed Done.
- Country code to be included while the customer is entering the phone number (text receipt).
- If an incorrect or invalid number is entered, they can use the back arrow symbol for clearing the number one by one.
- Select Clear to remove all the entered numbers and start over.
- If the user changes their mind and wants to switch to a different receipt option, they select the Back button.
- Screen in POS
- Once the number is entered and Done is pressed, the Thank You! screen appears confirming the Paid amount and that the receipt has been communicated per the Customer's selection. A countdown will appear until the page auto-closes, or click X at the upper-right to manually close.
Email Receipt
- The Customer enters their Email Address for the receipt generation, then presses Done.
- When the user clicks on the email address to type the keypad should open.
- A valid email address must be entered.
- If the user wishes to go back to the original screen, press Back.
- Screen in POS
- Once the number is entered and Done is pressed, the Thank You! screen appears confirming the Paid amount and that the receipt has been communicated per the Customer's selection. A countdown will appear until the page auto-closes, or click X at the upper-right to manually close.
Print Receipt
The receipt will be printed. The Thank You! screen appears confirming the Paid amount and that the receipt was printed. A countdown will appear until the page auto-closes, or click X at the upper-right to manually close.
Screen in POS
No Receipt
The Thank You! screen appears confirming the Paid amount. A countdown will appear until the page auto-closes, or click X at the upper-right to manually close.
Related Articles
Retail POS: Hardware Settings Overview and Recommended Devices
In POS, select Operation then Hardware Settings. Note: Only Employees with the proper Role and Permission settings have access to the Hardware Settings screen. The Hardware Settings screen displays the following tabs: Card Reader Printer Settings ...Retail Back Office: Receipt Printer Hardware Settings
Navigation: Sign into the Back Office. On the left-side Navigation Panel, click Settings. On the Settings page, under Hardware click Receipt Printers. The Receipt Printers settings page is broken down by the Printers and Settings tabs. Printers ...Retail POS: MPPG Payments
Configuration in Admin Select Account > Stores, then select the Store for which the respective Payment needs to be enabled. Under the Store Settings section, enable the MPPG toggle. When you enable the MPPG credit card toggle, the MPPG details appear ...Retail POS: SPPax Payments
Back Office (BO) BO Admin Requirements Navigation: Log into BO then select Admin > Stores Under Admin Store(s): When enabling the SPPAX toggle (setting to Yes), the SPPAX Details screen appears. Enter the mandatory details (pax device serial number) ...POS: Operation - Customer Display Hardware Settings
Back Office CDS Back Office Settings For more information, see the Back Office CDS Settings Knowledge Article. License Settings Navigation: Log into Enterprise, then select Licenses > License Settings To integrate CDS with the POS of a Store: the ...