Retail POS: Main Screen
The Retail POS screen displays the Categories created in the Retail Back Office along with the Settings (Gear) option at the top left. When a particular Category is selected, all Retail Items under the Category will be displayed, with the following columns:
- Item - Retail item configured in BO.
- Variant - Sub attribute configured in BO for retail item.
- SKU Code - Unique product code configured in BO. This Code can be multiple for a retail item. Based on the items tagged in sale, the consumption should be marked.
- Qty - Quantity of the item selected.
- Price - The price of a single quantity of the item.
- Discount - Amount of any discount applied to the item.
- Total - The value of the formula = (Qty x Price) - Discount.
- The X icon appears at the end of each Item's row to remove the item.
- If Subcategory is tagged, then the same will be displayed or if there is no subcategory then the retail item tagged will be displayed. Upon selecting a subcategory, the items tagged to subcategory will be displayed. Click the Back button to close the category/subcategory/retail item pop up.
Adding a Retail Item
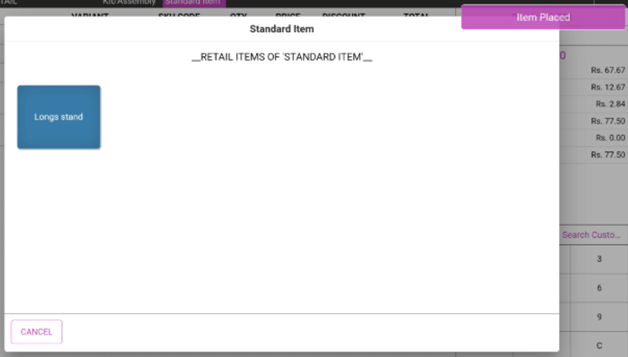
Selecting Standard Item
Standard item which is created in the BO will be displayed under its respective category. To place the item with Standard item in POS: click on the standard item and item will be placed in the order screen along with the 'Item Placed' confirmation message.
Selecting Variant item
Variant item along with its sub attributes which is created in the BO will be displayed under its respective category. To place the item with variant in POS:
- Click on the parent variant item and all the attributes and sub attributes created will be displayed.
- Select any necessary sub attributes for the variant item.
- If there are multiple attributes for the variant item then select sub attributes for all the attributes in the variant item.
- Selected attributes should be highlighted and if user want to edit the selected variant its user has to again click and user can change the necessary sub attributes.
- When ready, select Done. All the items selected will be displayed in the order summary.
- Done will be grayed out until all attributes have been selected
Selecting Kit/Assembly
Kit/Assembly is a combo item. All the standard and variant items added in the combo will be displayed. If it's a standard item, it will display along with the name of the standard item and an image of the item. If the standard item has any variant (such as Bracelet - Navy blue) that will appear, and the item will be grayed out. If a variant item is mapped to a Kit Assembly item, the parent name of the variant item will be displayed along with image of the variant item and attributes created for the variant item will be displayed in traditional order (below example Suit Combo: Shirt, Pants, Coat then Shoe).
- The necessary sub attributes must be selected for the variant item. You can select the attributes in any order. Example: if there's Size, Color and Brand then at least one of each attribute must be selected but attributes can be changed if needed.
- If an attribute is disabled in Back Office: when selected in POS the message 'Selected variant item is not available' will appear.
- If more than 1 variant is added to a Kit/Assembly item, then attributes for all the variant items must be selected.
- If there are multiple quantities for a variant item, then sub attributes will be selected for all attributes mapped for each quantity. All quantities will appear as displayed below.
- Variant Item Names may be abbreviated, Example: if the selected attribute is Green - Large in box it will appear as Gre - Lar and if more than 3 sub attributes are added the 3 letters will be reduced to 2 letters (Gr - La).
- After selecting all the necessary attributes and sub attributes for a Kit Assembly item, click Done. You are returned to the Order screen.
- The option will be grayed out if attributes aren't selected for variant items.
- If Cancel, the selection screen will be closed without selections being saved.
Placing Parent/Child items
- In POS, select the Search option then scan the barcode of the item and SKU Code of the item will be populated in the search bar and both the parent and child item with the SKUCODE will be displayed in the drop down.
- Based on the selection, the item will be added to the Order screen.
- When scanning the barcode of the item on the Order screen, a pop-up with the Parent and Child items appears.
- Select the item, and Item will be added to the Order.
Examples
- Parent item of COKE PACK and its Child COKE. Both will appear and the selected item will be added to the Order.
- Parent item of COKE PACK and its Child items Coke 1, Coke 2, and Coke 3. All items will appear and the selected item will be added to the Order but the pop-up won't close.
- Exchange: when a new exchange item is added to the Order screen the pop appears only for item which has this parent and child combo,
- When the SKU Code of a parent item is scanned then any matching child will appear in the pop-up.
Open Item
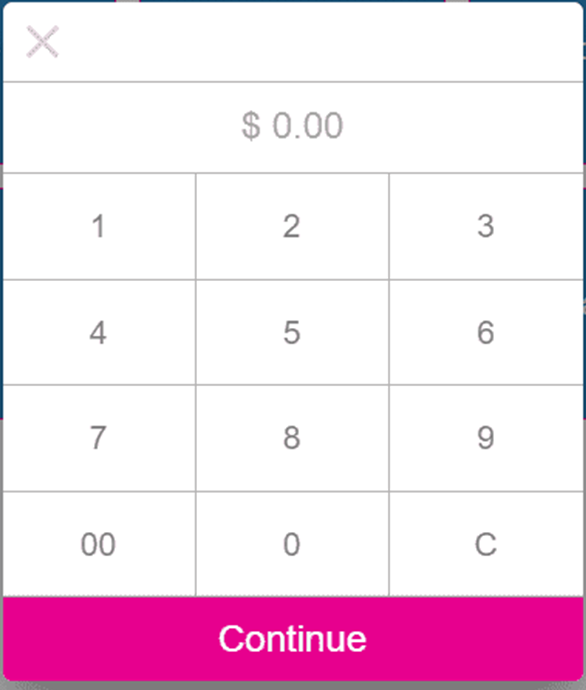
The Open Item toggle in Back Office applies to Standard Retail Items. If a Standard Item in BO has the Open Item toggle enabled: then in POS when a standard Open item is selected in POS, the number pad pop-up where the price of the item is entered.
An Open Item can be created directly in POS. Under Option in POS, there is the Open Item option. Under Receipt options, click Open Item. a new pop up appears which contains the following:
- Item Name - Enter name of the open item.
- Price - Set the price of the open item.
- Tax - Taxes configured in BO will appear and the needed taxes can be selected.
Allow Negative Price
If the Allow Negative Price toggle is enabled in BO: a negative price can be entered in POS, which means the store pays the amount to the customer and Tax won't apply to the item. The values will appear on the receipt and in reporting with a negative price.
- Select the open item in POS and the number pad appears where you're able to enter the negative value.
- When a negative number is entered the text color will change to red.
- If the Allow Negative Price toggle is disabled, the negative sign won't appear and a negative value can't be entered.
Scale Items
Back Office
The tare group Tare 1 was created, then a scale item was created with the Tare Group as Tare 1 and Default Tare as CUP.
POS
- When the scale item is selected, a pop-up appears which displays the Name of the item along with the serving size and price.
- Tare weight will be displayed which can be manually entered by clicking Open Tare in the screen or selecting the tare configured in the BO.
- Enter the item weight. The item weight (Weight entered - Tare weight = Item weight) will appear
- The Amount will be calculated based on the item weight (Item weight * price per serving size configured).
- To clear the Tare Weight, click Clear Tare.
- Five serving size will appear by default (Kg, lb, Oz, Gm, and Gal). The default will be the serving size of the item provided while creating
- The item weight will be based on the selection in the serving size system and tare weight and price will be calculated based on that.
Related Articles
Retail POS: Order Screen
Removing Items On the main Orders screen, each selected item will be accompanied by a red x which if clicked will remove the item from the Order screen before payment. If the red x is selected after submitting payment, the message 'Cannot delete ...POS: Retail Items
Back Office For a Restaurant: only Standard Retail Items can be created in the BO. Log into Back Office, select a Store, then select Products/Items > Products/Items. On the Products/Items page, click + NEW RETAIL ITEM at the upper-right. Note: POS ...Retail POS: Operation - POS
Under the Operation menu, select POS The main screen appears - with the Void, Sale History, Park Sale, Retrieve Sale, Option, Print, Discover, Cash, Payment, and Log Off options appearing at the bottom.Retail POS: Operation - Print Labels
Setting Up a Label Printer Back Office Before printing labels in POS, you must first have Label Printers configured in Back Office. Navigation: Log into the Back Office for your Retail Store. Select Settings. Then under Hardware, select Label ...Retail Back Office: POS Custom URL Application Settings
Navigation: Sign into the Back Office for your Retail Store. On the left-side Navigation Panel, click Settings. On the Settings page, under Application click POS Custom URLs POS Access URL – Toggle to Enabled (YES [Default]) to add URL Links (up to ...