Retail POS: Operation - Print Labels
Setting Up a Label Printer
Back Office
Before printing labels in POS, you must first have Label Printers configured in Back Office.
Navigation: Log into the Back Office for your Retail Store. Select Settings. Then under Hardware, select Label Printers.
You must have at least one Label Printer configured for your Retail Store. For more information, see the Knowledge Base Article.
POS
Select Operation > Hardware Settings
Under Printer Settings, the created Label Printer will appear. Both the Label Printer and POS must be connected to the same network. In POS the Label Printer will be online, and you can connect the printer.
Printing Labels
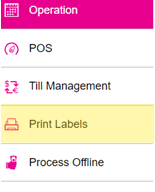
Select Operation, then Print Labels.
The Manage Retail Items page appears, with the Retail Item tab which contains a table with the following columns for each Item: POS Image, Item Name, Category/Subcategory, Inventory Count, Type, Brand, and SKU code. You can sort by any of the columns.
- Initially all Retail Items (Standard, Variant and Kit/Assembly) created under Products / Items in Back Office will appear.
- When the Select All toggle at the bottom-left corner is enabled, all items will be selected. The number of items selected '[number] items selected' will appear next to it.
Search
The Search option will be provided at the upper-right. You can search for an item by entering the SKU Code or Item Name.
If item is not available based on the SKU or Name entered, the message 'Item not found' appears.
Variant Items
- For Variant Items, a dropdown (identified by a plus [+] / minus [-] sign) will be provided and will be opened by default. Each variant item will contain the same columns as the main table.
- If an Item has multiple SKU Codes, then all SKU Codes mapped for each variant item appears and you can select the required SKU Code(s). The primary SKU Code will appear at the top by default. When selecting an item, it will be highlighted in pink. If a Parent Item is selected, then all of its variants will be selected. You can also select particular variant items.
Continue to Print
The Continue to Print button appears at the bottom-right. It will be disabled (greyed out) until at least one item is selected.
- Select Item(s) then click Continue to Print.
- The Edit Print Label Copies page appears which displays a table of the selected Item(s) with the following columns:
- POS Image – The assigned image of the item appears
- Item Name – The name of the Item
- Inventory Count– The quantity of the item currently available in inventory
- SKU Code – The unique SKU Code of the item
- Print Copies – Manually enter (or use -/+ to increase/decrease) the quantity to print on the Label Printer (mandatory). It will be the minimum 1 by default.
- The value entered will be the number of labels printed for that SKU. If 50 is entered, then 50 separate labels will be printed for that item.
- Actions - The Delete
option is available, and if clicked removes the item from the label print list.
- The Select All toggle is available the bottom left corner of the main screen. When enabled all items will be selected.
Scale item
Scale Items will appear on the Print Label screen with the amount configured for the Weight in the BO in the price on the label print.
Example: If the Weight of the item is 10g and price for 10g is $10, then on the label print $1/g will appear.
Open Items
For Open Items, the price won't be defined in Back Office so a price won't appear on the label. For other items, the price will appear.
Continue to Print
The Continue to Print button appears at the bottom-right. It will be disabled (greyed out) until at least one item is selected.
- Select Item(s) then click Continue to Print.
- The Edit Print Label Copies page appears which displays a table of the selected Item(s) with the following columns:
- Item Name – Items created under products and item will be displayed in the drop down. User can select the necessary item from the dropdown.
- PO ID – Purchase order ID should be displayed.
- Vendors – Vendor mapped for the order should be displayed.
- Quantity Ordered – Quantity of the items ordered should be displayed.
- SKU Code – Based on the selection in the ITEM drop down, SKU Codes will be displayed in the drop down.
- Example: If an Item has multiple SKU Codes, the SKU Codes mapped for the item will appear in the SKU Codes dropdown where you can select the required Codes.
- Print Copies – Manually enter (or use -/+ to increase/decrease) the quantity to print on the Label Printer (mandatory). It will be the minimum 1 by default.
- The value entered will be the number of labels printed for that SKU. If 50 is entered, then 50 separate labels will be printed for that item.
- Actions - The Delete
- Edit Copies in Bulk - Change the quantity of selected items all at once, helpful when working with a large number of labels that all need the same amount printed.
- Select the items to print in bulk, then click Edit Copies in Bulk. The Edit Copies in Bulk pop-up appears.
- Enter the number of Print Copies for the selected items, then click Continue.
- Remove Items - When multiple items are selected, you can remove them all at once with Remove Items.
- Click Remove Items at the bottom left (next to Edit Copies in Bulk). The Confirm pop-up appears.
- Select YES to confirm removing the items from the print list, or Cancel to keep them.
Print Labels
- When ready, click Print Labels at the bottom-right. The Print Labels Preview pop-up appears.
- Select a Template from the set of options configured in Back Office (Label Template Settings). The Print Preview to the right will change as a different option is selected.
- Printing displays the number of items and labels to be sent for print, and Label Size displays the Width and Height of each label.
- When ready, click Print Labels at the bottom-right of the pop-up. The print job will be sent to the assigned label printer.
- When sent, you are redirected to the main screen where the Edit Print Label Copies page will be cleared.
Notes:
- Remaining functionality will work as-is.
- Price shown in the Label Print will be the Selling Price.
- Both Open Items and Scale Items will appear in the Label Print.
Related Articles
Retail POS: Operation - POS
Under the Operation menu, select POS The main screen appears - with the Void, Sale History, Park Sale, Retrieve Sale, Option, Print, Discover, Cash, Payment, and Log Off options appearing at the bottom.Retail POS: Operation - Batch
In POS, select Operation then Batch. User Dropdown The User dropdown contains a list of users (employees), allowing you to choose a specific User from the list. Once a User is selected, you can view a list of transactions carried out by that selected ...Retail POS: Operation - POS Settings
Navigation: Log into POS, then select Operation > POS Settings Note: Only Employees with the proper Role and Permission settings have access to POS Settings. Till Settings This section is used to define the behavior of Till Management. Back Office ...Retail POS: Receipt Options - Print
Select the Option button at the bottom. On the Receipt Option screen, select Print. The Receipt will be printed (if a Printer is connected).Retail POS: Operation - Upgrade to New Version
Before upgrading, note your current Build Version number. In POS, select Operation then Upgrade to New Version. The Retail POS will be updated to the new build version. Note the upgraded Build Version number to confirm the upgrade.