Retail Back Office: Scheduler
Shift Management can be performed on the Scheduler screen.
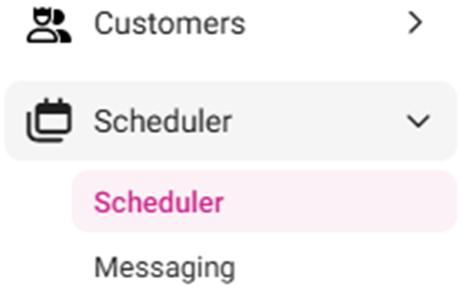
Navigation: Log into Back Office for your Retail Store, then select Scheduler > Scheduler
The Scheduler screen displays the following details and information:
- Note: The Scheduler screen appears only for Employees who have been given access to log into the BO, typically Admin and Manager roles. All the Employees working for the store will be listed and only the authorized users can assign the tasks. For all other employees, they can view their schedules using the Scheduler Website or the Scheduler App.
- Select View – Select either Week or Month.
- Week: Broken down by each Employee and their corresponding schedule for a week (the Current Week is displayed by default).
- Navigate to the Previous week by clicking on the left arrow (<) icon
- Navigate to the Next week by clicking on right arrow (>) icon
- Return to the Current week by clicking the Calendar icon between the two arrows
- Month: Broken down by a calendar view with each day containing a breakdown of each scheduled Employee (the Current Month is displayed by default).
- Navigate to the Previous month by clicking on the left arrow (<) icon
- Navigate to the Next month by clicking on right arrow (>) icon
- Return to the Current month by clicking the Calendar icon between the two arrows
- The Employees drop down is for selecting an available employee to assign them Shifts. There is also an option to select all Employees within a Role, denoted in the dropdown with [*] and then the Role name. The default is Select All, and you can choose a specific Employee to view their Shift.
- You can configure past 12am within a day.
- Example: Assigning a shift to specific role on July 1. You assigned shift timing for the Admin role from 8:30am to 2:30am, thus configured past 12am on July 2.
- Start Time must be prior to Finish Time.
- Example: If the Start Time is set as 8:30am, the Finish Time can be set up to 8:29am on the next day.
- Total Paid calculated over the Wage or Salary assessed (by the Admin user) on a Daily / Weekly basis. Under each Employee, it will display their total hours for the displayed week and the Payroll amount based on their Payroll rate. At the bottom of the list of employees it will display the Total for all employees for that week. At the bottom of each Day in the Week it will display the Total Payroll for each day.
- Under Week view: to assign a Shift to an Employee, mouse over a specific Date. The plus sign inside a circle
button appears.
- Click (+). The New Shift pane appears, with tabs for Shift and Select From Template.
- SHIFT – includes the ‘You are creating shift for [Employee Name] on [YYYY-MM-DD]’ header message.
- Role: Select the Role of the employee from the dropdown, which displays all the Roles that can be assigned to the selected Employee. Various Roles can be assigned to an Employee depending on the Store’s needs.
- To edit the Role, click the pencil
icon. The Update Role pane appears - where the Name, Export Code and Color can be changed – then click Update to save changes.
- To create a New Role, click + New Role at the bottom of the dropdown. The New Role pane appears, where the Name and Export Code for that role is entered and the Color is selected (color picker) – followed by clicking Save to create the Role. The ‘Role saved successfully’ message appears.
- Changes to existing Roles and creating new Roles are for Scheduler purposes only and do not change/add in the User Management > Roles section.
- Notes – Enter any notes for the Shift in the provided box.
- Timing
- Select the Start Time and Finish Time for the shift (clock view).
- Enter the amount of Meal Break and Rest Break time allotted for the types of breaks (in minutes), or use ▲/▼ to increase/decrease the amount.
- Note: These are unpaid breaks and will deduct those Breaks from the Total Paid amounts.
- To apply this Shift to the rest of the Employee’s week, set the Save for All… toggle to YES.
- To save this Shift as a template, set the Save as Template toggle to YES. The Shift will be saved as a template for all Employees with the same Role and appear as an option under the SELECT FROM TEMPLATE tab on the New / Update Shift pane.
- To save the Shift, click Save at the bottom-right. You’re returned to the Scheduler screen with the newly created (or updated) Shift appearing.
- To cancel the creation/updating of a Shift, click Cancel.
- When mousing over an existing Shift, the following options appear:
- Plus Sign Icon (Add Shift): The New Shift pane appears, with fields pre-populated based on the moused-over Shift.
- Pencil Icon (Edit Shift): The Update Shift pane appears, with fields pre-populated based on the moused-over Shift.
- Trash Can Icon (Delete Shift): The Delete pop-up appears. Select Delete to delete the Shift, or Cancel / X Close to keep the Shift.
- When a Shift is deleted, the employee will receive an SMS notification about the deleted shift, provided a valid phone number is associated with the employee record.
- Once all Employee Shifts have been set, the changes will be reflected only when the option Publish & Notify is clicked. Otherwise any new or updated Shifts will be treated as unpublished shift (which appear as a small red text notification next to the button). When a Shift is published, the employee(s) will be notified via SMS/Text if the Account has texting enabled if the Account has texting enabled.
- To print the current view of Shifts, click the Print button (next to the Employees dropdown).
Related Articles
Retail Back Office: Employees Scheduler
Scheduler provides a view of Employees Details via the Employees screen. To Add, Edit or Delete Employee information - see the Users screen. Only Admin level users are authorized to manage Employee details. Navigation: Log into Back Office for your ...Retail Back Office: Messaging Scheduler
Navigation: Log into Back Office for your Retail Store, then select Scheduler > Messaging Messaging enables Staff to communicate with each other. The Messaging screen is broken down by tabs for Inbox and Sent Items. Inbox Sent Items Inbox Displays ...Retail Back Office: Requests Scheduler
Managers (Admin level) can approve requests for Time Off or Shift Swapping. Employees can approve Shift Swapping requests from their co-workers. Navigation: Log into Back Office for your Retail Store, then select Scheduler then Requests The Requests ...Back Office: Employee Scheduler
Scheduler provides a view of Employees Details via the Employees screen. To Add, Edit or Delete Employee information - see the Users screen. Only Admin level users are authorized to manage Employee details. Log into Back Office then select a Store. ...Retail Back Office: Store Scheduler Settings
Navigation: Sign into the Back Office for your Retail Store. On the left-side Navigation Panel, click Settings. On the Settings page, under Store select Scheduler. On the Scheduler Settings page, enter or update the following info: Business Name – ...