Retail POS: Face ID
Face ID allows users to clock-in/out or to login to POS by matching the camera capture of the face of a user with his/her existing photo in the system, by using face recognition APIs and algorithms.
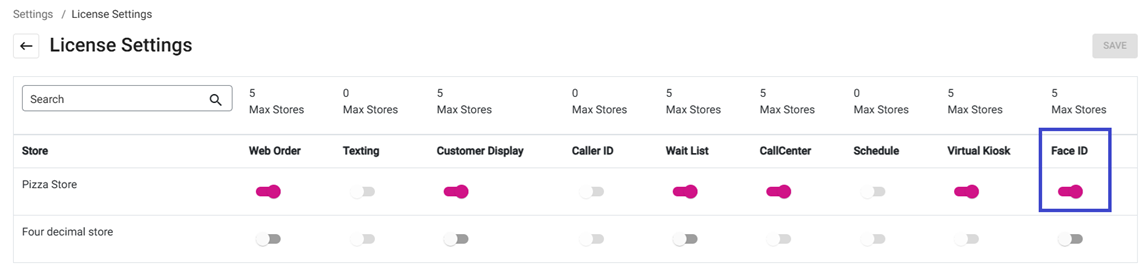
Navigation: Log in to the Back Office, then select Settings > License Settings
Make Face ID Available
The Face ID toggle must be enabled for the store to make Face ID functionality available.
Enable Face ID for a Store
- Navigate to Settings > General Settings
- For the Login / Clock in Via field, ensure Face ID is selected. Both PIN and Face ID can be selected for Clock In or Log In.
- Log in with a PIN then select Operation to view the Operation menu in POS.
- Tip: Once logged in, you can select the Settings icon at the bottom-left of the Orders screen.
- On the Operations screen, click Face ID. Select the green circle icon opposite the name of the person you want to take a picture of.
- Note: a camera must be connected to the device that's currently logged into POS.
- The Scan Your Face window appears, and the picture [for Face ID matching] will be taken within 3 seconds.
- Note: This picture will be compared with the photo taken while the employee is Clocking/Logging in.
Clock In / Log In Using Face ID
Once Face ID is enabled for POS and pictures of the staff have been taken, the staff can use Face ID to Clock In/Out - or to Log In to - POS.
- Select the Face ID button on the Login screen. The Scan Your Face window appears.
- The Scan Your Face window will capture an photo of the face of the person that is attempting to log in to POS. This image will be compared against the one already taken and stored in the Face ID settings of the iPad app, and - if the two images match - the user will be allowed to Log In.
Like Login, you can use your Face ID for Clocking In (or Out).
- Select the Clock In button.
- Select Face ID to clock-in via the Face ID option.
- A photo of the user’s face will be taken, then compared against the photo in the system.
Related Articles
Retail POS: Login Screen
Once signed in, the Login screen appears: The Login screen displays the following buttons: - Select Back Office to navigate the Back Office (for more info, please refer to the Back Office section of the Knowledge Base) - Select Operation to navigate ...Retail POS: Time Clock
If Time Clock is selected, the Time Clock pop-up login screen appears. Enter the PIN number or Face ID to log in. Clock In When an Employee Clocks-In for the first time that day, the PIN screen will appear. Enter the PIN - or click the Time Clock ...Retail Back Office: Subscriptions & Upgrades - Summary
There are 2 plans available for a Retail Subscription: Pro and Enterprise. Add-Ons for Retail The 9 addons available for Retail: Alerts, CDS, Feedback, Insights, Inventory, Loyalty, Marketing, Schedules, and Stock. Billing for Subscription The ...Retail Back Office: Email Receipt Template Settings
Navigation: Sign into the Back Office for your Retail Store. On the left-side Navigation Panel, click Settings. On the Settings page, under Printer Templates select Email Receipt Template. The Email Receipt Template page is for configuring what you ...Retail Back Office: General Application Settings
Navigation: Sign into the Back Office for your Retail Store. Select Settings, then under Application select General Settings. On the left-side Navigation Panel, click Settings. On the Settings page, under Application click General Settings. On the ...