Back Office: Customers - House Account
- Sign into the Back Office and select a Store.
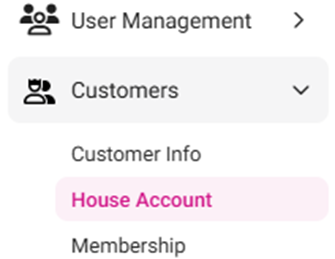
- On the left-side Navigation Panel, click Customers then House Account.
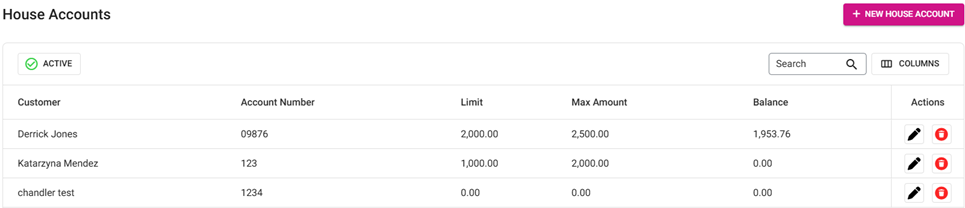
The House Accounts page appears, which displays a table of existing House Accounts containing the following columns: Customer, Account Number, Limit, Max Amount, Balance, and Actions (Edit or Delete).
Edit – When clicked, the Update House Account page appears. By Default, update button will be disabled. You can change any details if required and click on Update for the changes to get reflected in selected House Account. After clicking the Update button, House account updated successfully pop up will be shown.
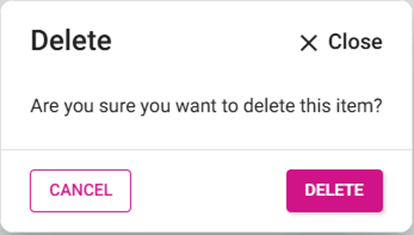
Delete – When clicked, the Delete pop-up appears. Select Delete, and the Customer details will be deleted. Select Cancel to keep the Customer.
To create a new House Account, click the + New House Account button at the upper-right (or to Edit an existing House Account, click the corresponding pencil icon under Actions). The New/Update House Account page appears. A new/updated House Account cannot be saved or updated (clickable Save / Update button) until all Mandatory fields are filled in.
Customer: (Mandatory) Select a Customer from the dropdown.
Account Number: (Mandatory) Enter the Account Number of the selected Customer (no number restriction).
Balance: Enter the monetary Balance (up to 2 decimal points).

Enable Period Limit: If the toggle is Enabled (set to YES), select the Limit Period from the dropdown (Daily, Weekly, or Monthly) then enter the Limit Amount.
If Weekly is selected, an additional dropdown will appear to Select the Day of the week (Mandatory).

Allow Credit: If the toggle is Enabled (set to YES), any stored Credits will be available for using during House Account transactions (Refund type).
Enable Max Limit: If the toggle is Enabled (set to YES), set the Maximum Limit Amount (Max Amount Limit) for House Account transactions (Mandatory).

Related Articles
Retail Back Office: Customers - House Account
Navigation: Sign into the Back Office for your Retail Store. Select Customers > House Account. The House Accounts page appears, which displays a table of existing House Accounts containing the following columns: Customer, Account Number, Limit, Max ...
Retail Back Office: House Account Reports
Navigation: Log into the Back Office for your Store, then select Reports > House Account. House Account allows customers to have an account with your Store (like a Gift Card), but functions like a Credit Card where there is a limit and a balance. The ...
Back Office: House Account Report
Allows customers to have an account with a restaurant (like a Gift Card), but functions like a credit card where there is a limit and a balance. It includes tabs for HA Activity and HA Statement to display data in a table view. HA Activity HA ...
POS: House Account Payments
Back Office Accounts Navigation: Log in to BO Admin, then select Accounts > Accounts Account Settings Account Level House Account - By enabling the toggle (set to YES), the Account Level House Account will be available for the specific Account. If ...
Retail POS: House Account Payments
Back Office Accounts Navigation: Log in to BO Admin, then select Accounts > Accounts Account Settings Account Level House Account - By enabling the toggle (set to YES), the Account Level House Account will be available for the specific Account. Store ...